
Hi everyone, I've moved to a new site – I'd love to see you there!
Cecelia

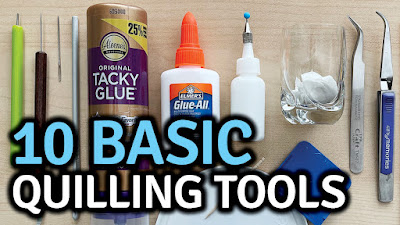
If you’re new to quilling and you’re shopping for supplies, it can get confusing and expensive! There are so many more options than when I first started quilling in 2006. You don’t have to buy expensive quilling tools or supplies to get started in quilling.
Here are my top 10 basic quilling tools for beginners that I’ve used since 2006. You can use this list as a reference to build your own quilling kit.
1. Slotted Quilling Tool
2. Needle Quilling Tool (or toothpick / chenille needle)
3. Crochet hook (for on edge quilling of thicker 160 gsm paper)
4. Glue: Aleene’s Tacky Glue / Elmer’s Glue All
5. Fine Tip glue bottle (or yogurt lid toothpick)
6. Shot glass and damp tissue
7. Fine Tip Tweezers
8. Reverse grip tweezers
9. Circle template
10. Plastic cards
➡️ MY TOOLS: https://kit.co/PaperZen
 Watch the video: https://youtu.be/_KBtIlJfBOE
I had great fun chatting with Charlotte Marshall of The Quilling Quarter recently. Her thoughtful questions and insightful connections helped me see my work with a new perspective.
She's a natural interviewer and I've been enjoying meeting her previous quilling artists on her YouTube Channel, so I was honored to be given her spotlight.
She took so much time to research the directions my crafting has taken me, what inspired me to start down this path, and where it's led.
I love how she's sharing what she's learning along her discovery of quilling, her thoughts about her progression. Seeing someone talk about their discovery reminds me of the thrill of the hunt, and gets me inspired once again.
She also reviewed my latest e-book, Quilling Phrases. I love how she showed her progression with quilled typography, and what she learned along the way.
Subscribe to The Quilling Quarter YouTube channel for more of Charlotte's interviews, insights, and projects.
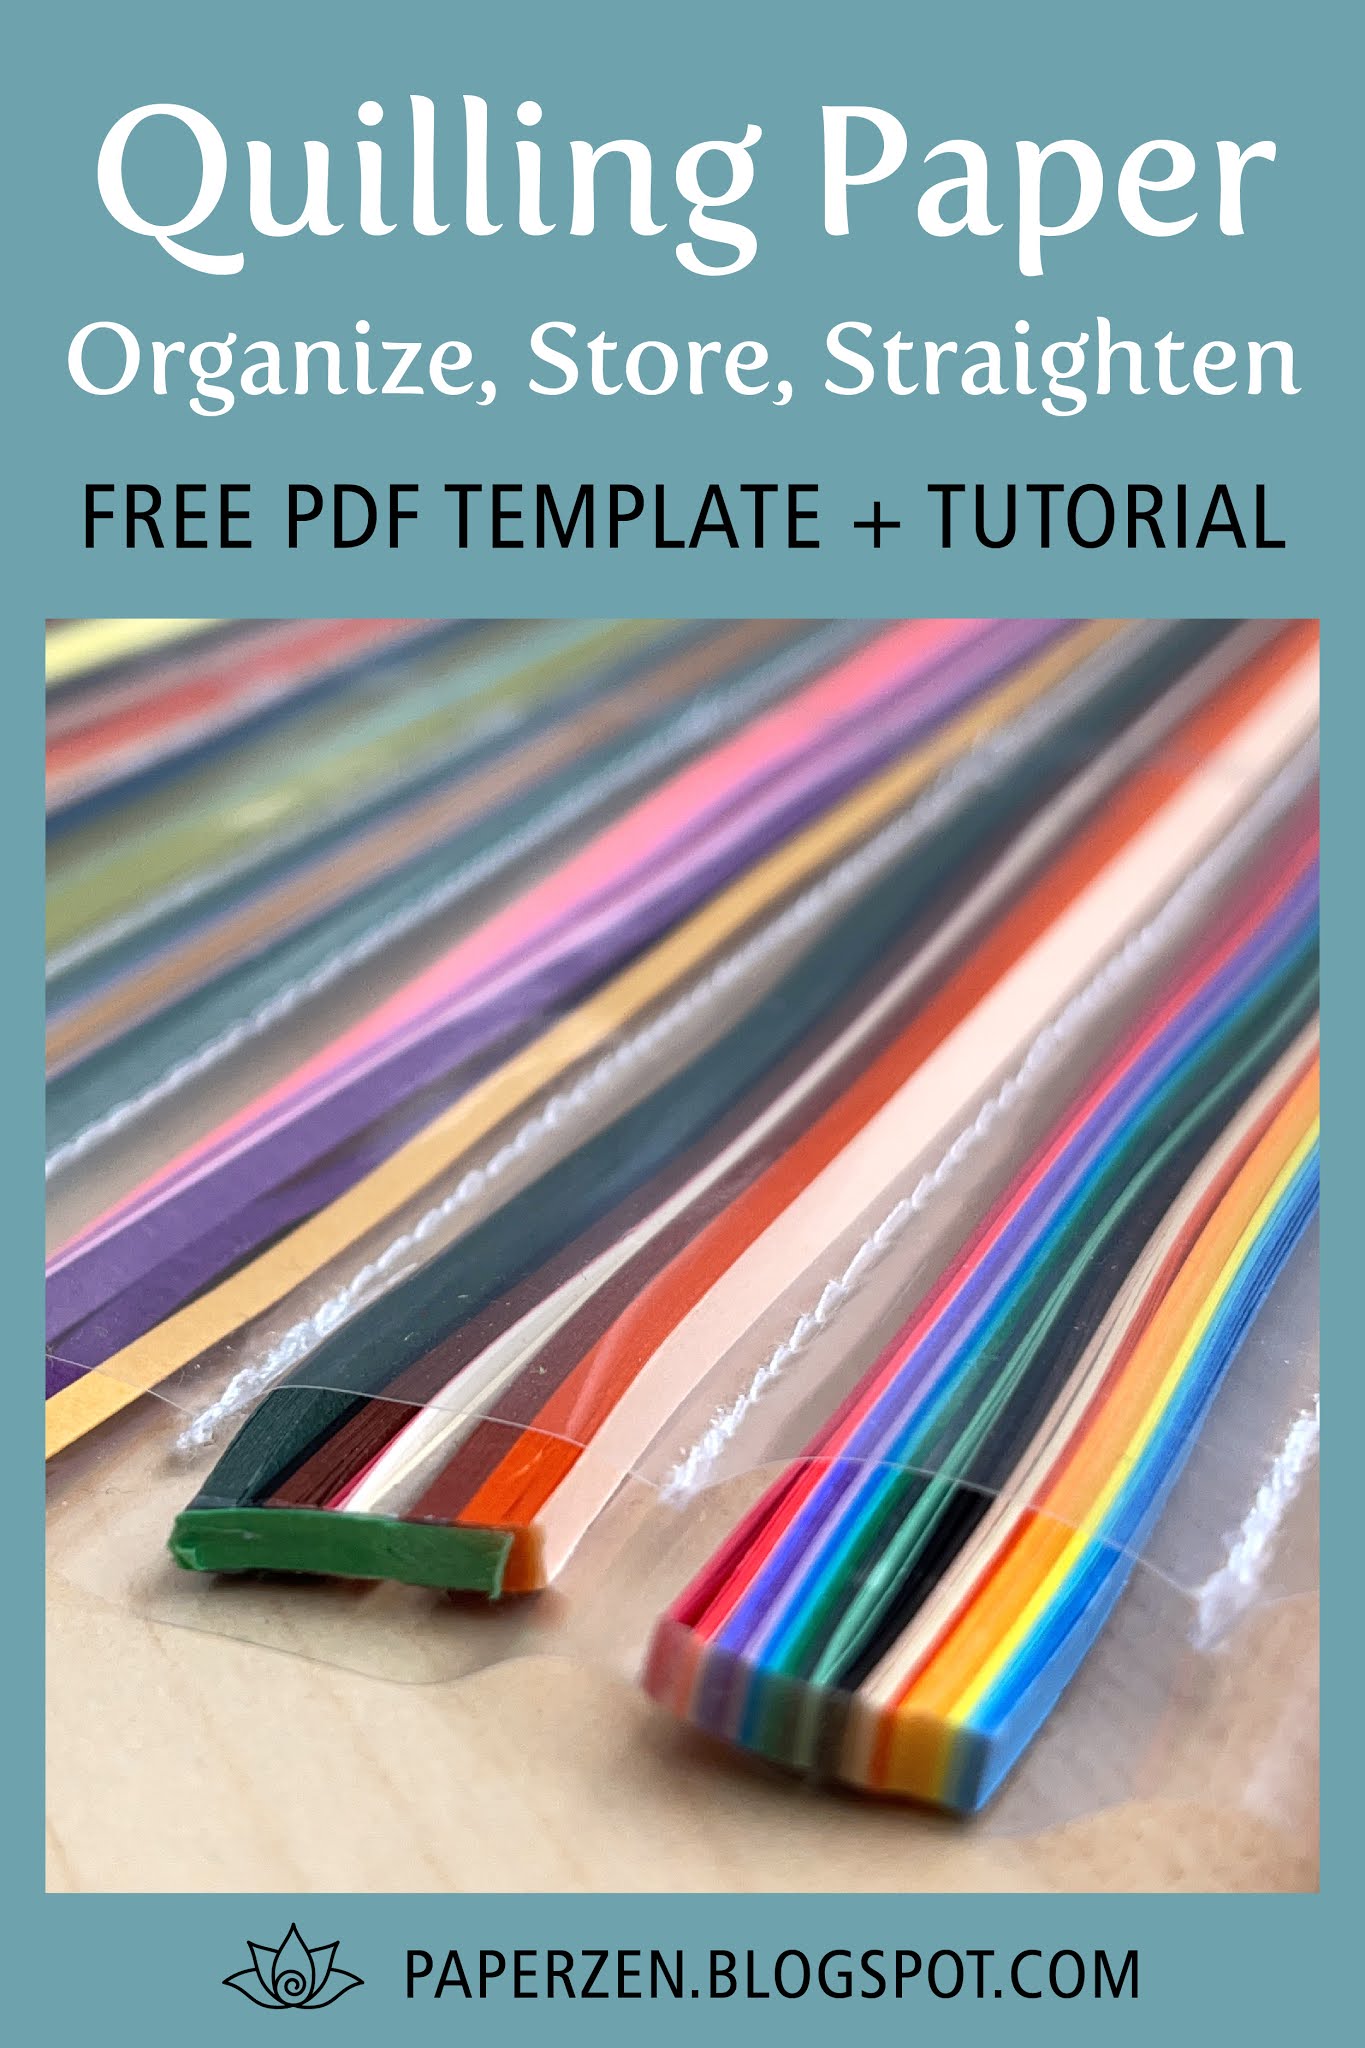
Let's organize your pre-cut quilling paper strips, so you can find any color or width quickly. Storage of conventional quilling paper can be done easily, while keeping it straight and tidy.
My first quilling paper came from the book, Twirled Paper, by Klutz. I still recommend this book to any beginner quiller, because it comes with everything you need to get started: a slotted tool, paper, glue, googly eyes, and fun patterns. I used a shoe box for storage but I’d accidentally crimp the paper. When I bought more paper and of course, it got messy.

I decided to pin my paper to some foam core to straighten my paper. I loved how I could find any color, and have immediate access. Then we moved and I had a smaller space, so I couldn’t lie my board flat. I realized when I had to store the board vertically, the weight of gravity would make the paper split apart. (read more here)

We moved again and I had more space, so I made a custom foam core box with dividing channels and notches to access trays below. It was meant to be like the cork board method without the pins. The foam core was the perfect height for protection against accidental crimping.
I liked how I could set the box on the open drawer, and make it behave like a table, and it didn’t need space on my desk, but it was a hassle to access the trays below.
In the end, my foam core organizer looks nice and works in theory, but in reality, as I reach for a strip, it would jump out of the channel, so I wrapped paper bands around them to keep them tame. Then I even used removable tape across the channels keep them fenced it. It worked ok, but I didn’t love it. (read more here)
This is also when I started using a binder for the left over strips (read more here). I love how I can find the exact left over strip. I really didn’t like it when I reached for a new strip, only to find out I already had a half used one ready to go. I could combine the similar colors together. The binder is very condensed and great for travel too, especially if you’re just travelling to your kitchen table or couch.
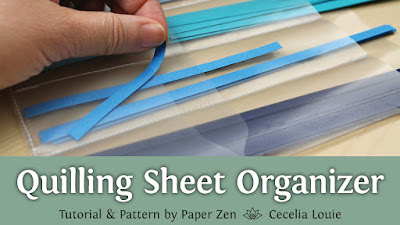
In a previous video, I showed how I organize my 11” quilling strips with a plastic sleeve. I love how I can put them in a binder, or in a container on my desk to reach for any color. Best of all, I can store the leftover strips in the same area. This really suits the thicker paper I like using for quilling letters, which is Canson Mi-Teintes. (read more here)
Since the plastic sheet organizers were so perfect for storing my short strips, I was happy to find a large format or 11x17 inches sheet as well.
The conventional quilling paper I have my craft room are between 18 to 24” long, depending on the brand. I needed to extend the plastic sleeve a bit, to make sure the ends don’t flop around, so I cut another plastic sheet into thirds and added it on the right.
The plastic sheets are very thin, so it takes up less space in the drawer. I can stack several layers on top of each other in my drawer, and reach for a specific sheet, even if it’s on the bottom.
I’ve divided most sheets into 12 rows. I grouped colors in warm, cool, multi color, and wider/thicker strips. The wider/thicker strips obviously needed more room, so there are less rows on this sheet.
The clear plastic lets me find any color and check the width by turning the strips.
I plan to use Washi tape to remember the brand name and color.
As I slide the papers in, the rows help tame the strips with a few taps. Its easiest to slide the paper in from the left, because the top piece of plastic is shorter than the plastic on the bottom.
To detach a strip, pull the paper out slightly on the left, and detach on this side. Then detach the other side and slide the single strip out. The rest stays put.
To figure out the row width, all I did was slide some paper in, and pinched the plastic to see how much friction was there, when I slid it back and forth. As you use up your paper, it won’t have as much friction because there’s more room. When this happens, the paper can skew diagonally. Other than the paper being a loose fit within the row, it doesn’t seem too bad. A loose fit in the row could result in it sliding out of the plastic sheet due to its own weight. So I do need to remember to keep the sheet level as I handle it.
You can put smaller quantities together to bulk it back up. Here I’ve put several single strips together, and as I pull on one strip, the rest seems to stay in place. I haven’t been using it long enough really to know if this is a nuisance, but so far it seems ok.
If you want a color in the middle of a multi color pack, I do find it need to pull the paper out more so I can get access to the color I need.
I would say it’s easier to detach paper from a pack that’s all the same color vs one that’s is a multicolour pack - but when you can’t decide on a single color, what are you gonna do?
Since the pros greatly outweighs the cons, so far I’m pretty happy with this method compared to my previous organizers.
Please let me know what you think of this idea in the comments below. Giving me your feedback let’s me know if these tutorials are helpful, and it just keeps me motivated.
If you have a quilling storage hack, please share it in the comments below so we can all learn from you too!

Do you have a favorite way of storing your quilling strips? Please share your ideas with the rest of the quilling community in the comments below!

Learn how to make a quilling circle template using your Cricut Explore (or any SVG compatible electric cutting machine).

Download my free files:
A: Quilling Circle Template - PRINT (PDF)
B: Quilling Circle Template - CUT TOP (SVG)
C: Quilling Circle Template - CUT BOTTOM (SVG)

Steps:

Steps:
If you’re new to quilling and intimidated to start, then try this easy Valentine’s Day card, using basic quilling shapes. Watch my tutorial or read more about it below.
Page 1 has two tinted hearts ready for your quilling, and page 2 has the added message of “be mine, valentine!”, so you don't have to worry about outlines or centering elements on the card.

Step 1: Download my free PDF pattern, and print it onto card stock
Step 2: score vertically in half with a score board or a dried up pen
Step 3: cut horizontally, fold, then unfold so it lays flat on your desk
Paper used: conventional quilling paper, 1/8 inch wide

This card is based on a birthday card I made for my mom in 2007, inspired by a store in the mall called La Vie En Rose. She loved it so much she kept it on her fridge for years.
Length of S- and C-scrolls: 4” long

Loose Scrolls look like question marks to me and are combined with easy heart outlines for this card.
If you struggle with accidental glue globs, what I do is set one end down first while keeping the other end up in the air. Then I set the other side down. This way your eyes are not struggling to look at so many crucial areas at the same time.
For more tips about glue, watch my video tutorial about Quilling Glue Basics - 5 Tips
Length of Loose Scrolls: 3” long
Length of Hearts: 1.5 and 2” long

For this card, I used a die cut punch I bought at the dollar store to make easy leaves. After punching this flower, I cut each petal loose, scored them in half with my needle tool, then folded – BAM! Your leaves are ready for your bouquet.
Length of Closed Coil Flowers: 2” and 3” long

Protect your quilled greeting card with a puff of air using my FREE pillow box envelope pattern. Read more.
We quillers can buy circle templates from Quilled Creations, and dollar stores, but they all have pros and cons. So I designed my own DIY circle template with the following wish list:

Step 2: Print onto card stock
Step 3: Choose a method below

Make circles out of quilling paper, using a crochet hook or any other item with the exact diameter needed to match the circle. Ensure your strip width is shallower than the coil you plan to place inside, so you can still pick up your coil again with tweezers.

Nylon or metal flat washers are inexpensive items at a hardware store. Match up the inside circumference and glue them down with Scotch Quick-Dry Adhesive, ideal for gluing metal or plastic embellishments. I only dab a little glue to avoid it squishing out from the bottom. The depth of the washers seemed just right for 1/8” width quilling paper strips. I even stacked two nylon washers together for 1/4” width coils, and it seemed to hold.

Mat board strips cut to 3/8 wide x 5 inch long fit in between each row perfectly. Glue down these “fences”, and allow your coils to expand between them.

Adhesive foam squares from the dollar store placed on either side of a circle will also act as a fence to keep your coils contained.

Circle cutters such as NT Cutter or Olfa will cut a clean circle out of your card stock. To raise the template off your work surface, simply add mat board strips underneath.

Although these 5 methods above will work, I will readily admit I prefer cutting my circle template with a Circuit Explore Air cutting machine. I plan to go into further detail in a future tutorial and video.
I hope you like my Quilling Circle Template Board – leave me a comment below and tell me what is your favourite template. If you have a way of making yours, please share your ideas with everyone in the comments below so we can all learn together.

I'm inspired by quotes. They remind me of what's really important in my life. So why not make quotes out of quilling paper?
With my new e-book, Quilling Phrases, you can type your own quote and start quilling your phrase. Decorate it with floral elements and give a customized gift to your loved ones.
Every element has been pre-measured. Simply place your quilling paper on top of the template, then follow my step-by-step tutorials.

Step 1: Choose your phrase.
Step 2: Choose your layout. Type your phrase. Print.
Step 3: Trace the template.
Step 4: Start quilling letters following the pattern.
Step 5: Glue your letters.
Step 6: Shape and glue the floral elements.
__________________________________________________________
➡️ Watch trailer: https://youtu.be/039DCCVvmyI
_________________________________________________________
➡️ Download FREE Trial: https://bit.ly/3n22BrT
_________________________________________________________
➡️ Buy the Book: Quilling Phrases
_________________________________________________________


The making of this book took quite some time, as I had to learn so much new technology to create it. I hope you're inspired!

Download a free pattern for quilling the upper and lowercase letters A and a and give it a try!


Do you struggle with making consistent basic quilling shapes using a circle template board?
In my latest quilling tutorial, I’ll show you a couple of circle template boards that cost $10 and $2, and talk about the pros and cons of each.
Learn how to use a circle template board for basic quilling shapes, such as regular coils, eccentric or off center coils, and teardrop shapes.
Avoid common problems beginner quillers face when they’re making these basic shapes, including tension, different types of quilling tools, and varying weights of quilling paper.
In all my tutorials, I share the knowledge I’ve gained since I started quilling in 2006, but I don’t have all the answers. So if you have a great tip or technique to share, please let us know in the comments below so we can all learn and improve, including me!
The two circle templates in my craft room that I use for quilling are from Quilled Creations and a local dollar store. Here are some pros and cons of each:

Circle Size | Length of Paper (inch) | (cm) |
Size 0 | 16” and over | 45 cm and over |
Size 1 | 16” and over | 45 cm and over |
Size 2 | 12” to 16” | 30 to 45 cm |
Size 3 | 8” to 10” | 20 to 25 cm |
Size 4 | 8” | 20 cm |
Size 5 | 6” | 15 cm |
Size 6 | 4” | 10 cm |


After making this tutorial, I started asking myself, "What would I do, if I could design my own circle template?" Making quilling patterns is like making a new cookie recipe – I have to write down how I made each element or else it won’t turn out exactly the same. I wish the current options for circle templates provided better numbers for quillers, noting both circumference and length of paper strip needed.
If you could design the ultimate circle template, what would you want it to look like? Let me know in the comments below. Thanks for watching and see you next time!

A common problem paper crafters face when refilling glue from a large bottle to a fine tip bottle, is the dreaded air bubble.
Even though my quilling glue bottle is empty, the air is trapped because the glue covers the opening, so you need to "burp" the air out before more glue can be refilled. If you don't expect it to happen, the glue can overflow onto your desk, making a huge mess.

Here is my simple technique to fixing this problem:

When refilling from a large (16 oz) to medium bottle (4 oz), the natural tendency is to hold the bottle openings close to each other, to prevent any overspill.
However, if you look at the stream of glue, you'll see it's wide near the opening, and tapers as it pours.

Did you know you can customize your Aleene’s glue nozzle? You can choose how fast you want that stream of glue to flow, like I did with my 16 oz bottle. A new nozzle has a small protrusion at the tip and you can’t squeeze any glue out just yet. Here are the steps to customize it:
Refill your glue faster by cutting the nozzle exactly the size you want.

I love this bottle! I remember doing a little dance of joy in the aisles at Michael's when I found Aleene's Always Ready Tacky Glue bottle! Here's why:

I use this bottle when I want to smear my glue puddles for quilling. Why would I smear my glue puddles? Watch this video for Quilling Glue Basics:
Some quillers enjoy using Elmer's glue, which already has tapered nozzle. Your hand can go numb trying to squeeze the glue through that small hole when refilling.
Try this instead:
If you don’t want to trim your nozzle, you can buy a 3D printed nozzle from Ana of Her Paper Paradise, from her Etsy shop. The Easy Fill Glue Bottle Nozzle is 1/4 inch (7 mm) wide and allows you to refill from both Aleene's and Elmer's bottles.


