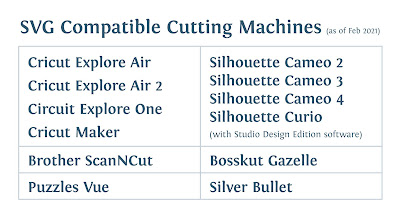
Learn how to make a quilling circle template using your Cricut Explore (or any SVG compatible electric cutting machine).
How to Make a Quilling Circle Template Board Video Tutorial
Digital Files
Download my free files:
A: Quilling Circle Template - PRINT (PDF)
B: Quilling Circle Template - CUT TOP (SVG)
C: Quilling Circle Template - CUT BOTTOM (SVG)
Method 1: Cutting a Circle Template with Card Stock
Steps:
- Print the (A) PDF template onto card stock. You’ll notice there are no circles printed on it, because I’m going to cut them out, so I don’t want any circles in the way.
- Import the (B) SVG file into your cutting machine software, to cut the circles out of your printed card stock. The circles are the exact size shown in the printed template.
- Import the (C) SVG file into your cutting machine software, to cut the circles out blank card stock. These circles are larger than the ones on the top layer to avoid have to line everything up perfectly when I glue these layers together. When you allow your coil to unwind, it will only touch a single top layer. Cut as many layers as you wish to build up the depth you prefer for your quilled coils. I cut mine from 6 sheets of 80 lb card stock (80 lb = about 218 gsm) for 1/8" wide quilling strips.
- Glue all the layers together and let the template dry overnight under a stack of books to ensure your template will not have any bowing.
Method 2: Cutting a Circle Template with Mat Board
Steps:
- Same as Method 1.
- Same as Method 1.
- Import the (C) SVG file into your cutting machine software, to cut the circles out mat board.Visit the Cricut help page for more details about cutting thick materials such as mat board: https://help.cricut.com/hc/en-us/articles/360009429034-Cricut-Maker-Moving-the-star-wheels-on-the-roller-bar
- Move the star wheels (for Cricut machines only)
- Cut mat board 12x10 inches
- Use the Cricut Deep Cut blade and the turn the dial to the last setting before "Custom"
- Glue all the layers together and let the template dry overnight under a stack of books to ensure your template will not have any bowing. I cut mine from 2 sheets of mat board for 1/4" wide quilling strips.


I have tried to down load this and for some reason it will not down load. Will it be to much for it to be sent to my email? kems32@gmail.com Thank you so much
ReplyDeleteLinda D
Sorry, I'm not sure why it's not working, but I've emailed it to you now.
Deletehybrid and thank you for the template it is great and useful for doing many circles of the same size.
ReplyDeleteYou're very welcome Penny!
Deleteit is saying my machine don't support the file.
ReplyDeleteWhat type of file is supported by your machine then?
Delete