Showing posts with label valentine. Show all posts

Feb 13, 2018

Quilling Letters M+N - Multi-Strip Scrolls

Quilling Letters M and N - Multi-Strip Scroll Tutorial and Pattern - Valentine Card

Multi-strip scrolls are mesmerizing! The quilling strips seem to magically widen and taper as if it's one strip. 

Feb 6, 2014

Quilling Valentine Card – I Heart You Emoticon


For those who love to emoticon their thoughts, this is a quick and easy way to quill a letter for an easy Valentine card. I used the font Courier and typed it in the middle of a 4x4 inch card, turning the heart red. I used a skewer stick to round/rub the number 3's curves, then I had the perfect "guidelines" for gluing right on top.


Since there was so little paper edge to glue, I decided to use card stock rather than usual thinner quilling paper, otherwise I find it structurally weak. I have a pack that Michael's used to sell (haven't seen it for years in Canada now). I don't use it for quilling small coils or else it frays. So for this type of open lines, it's perfect. I think this is the fastest quilled card I've ever made :D

If you'd like to make it too, download the free PDF file here.

Feb 5, 2014

Free Mustache Valentine Card

I thought it would be fun to swap out the standard "I heart U" with a mustache icon. The die cut heart edges are rubbed with an ink pad to give it more definition. The larger 5x7 size is all printed, and the 4x6 size is actually a quilled mustache.

When they open it, the message is complete.


To make the quilled mustache, I used a 6" strip and made a teardrop, then curled the tapered portion.

If you'd like to print your own, please leave your email in a comment and I'll email you the file until Valentine's Day, Feb 14, 2014. There will be 4 pages in the PDF file - 2 sizes and 2 versions whether you'd like to print and/or quill the mustache. Hope you have fun with it!

Cecelia

Jan 22, 2014

Lark Book: Quilled Valentine Card


Since the Valentine card is shown on the back cover of my book, Pretty Quilled Cards, I thought it would be timely to feature it in a post. This is a project I know all beginners will love because it's easy. In fact, I happen to know boys like making it for girls as much as vice versa.

I know when I started quilling cards as gifts, I got stuck figuring out where/how to glue it. So this flip design is included in the book (there are a few sprinkled throughout the book). Simply photocopy the design, score, cut where indicated, and voilĂ  – the perfect background for a memorable Valentine's card.


Each week when I visit Amazon, I discover they unveiled something new in my book – is this a deliberate sneak peek, building up to the day? Since I never anticipated a book this way, I've never taken note. Now I've learned they are showing a few pages inside! You can finally see what I mean about how the lengths and fold marks are shown rather than stated. This means all you have to do is lay your strip on top and cut/fold where indicated.

Every strip is labelled so you can find it in the template easily. The quantity of each strip is also stated so you can cut as many as needed, efficiently. Each project includes an actual size template, which can be photocopied and placed under a sheet of plastic wrap to be pinned on. I remember reading once that Martha Stewart's recipes were always stated in the order they were needed/used. I kept that in mind as I listed the elements and tested each design.

When deciding card themes, my editor and I were conscious of celebrations throughout the year as well as cards for other occasions like "congratulations on a new house", a "get well soon", or a simple "thank you". Besides listing each project, the Table of Contents page also has an indication of skill level (1-5) so you choose based on your comfort zone.

Since showing my advanced copy to friends and family, I think the most flattering thing I've heard so far (from a non-quiller) is that my step-by-step diagrams and photos make it seem like they can do it too!

Jan 16, 2014

Valentine Party Favors


These 5 printable Valentine party favors have now been added to my Etsy store. They are so quick to make that you'll have lots of time for filling them up with sweets. Each message has a different background pattern.

Thanks for all your great enthusiasm for the past Halloween and Christmas party favors. Please use this coupon code to receive 25% in my Etsy store until next Friday, Jan 24th: VALENTINE25

Hope your Valentine's Day is filled with sweetness all around!


Feb 2, 2012

Valentine Collection made by Brigit


I've had the pleasure of meeting Brigit on the Make-The-Cut Forum. She volunteered to test my "No Peeking! Boxes" during Christmas on her Zing and was kind enough to try out my Valentine collection as well.

Her thorough feedback was invaluable - especially as I learned that her Zing would cut notches where my lines didn't join - something that didn't show up on my Silhouette. Since scrapbooking is not my forté, I also loved seeing how she envisions my designs. It was her ink pad distressing that showed me how to give my 3D paper balls an extra pop, especially with the speeding arrows. To see more of Brigit's paper projects, visit her blog at: http://irishmist59.blogspot.com/

Thanks so much Brigit!!!

Cecelia

Jan 14, 2012

3D Paper Ball with Hearts and Arrows

Beware of Cupid’s shooting arrows! It was a great discovery my first time to use an ink pad on the edges of my paper ball decorations to add dimension. I realized dragging the ink pad across the arrow would make it appear as if Cupid had just let it fly, especially when it caught on the edges.

Version 1 is easy to put together since it’s a single sheet of paper. Simply use beading wire, fishing line, or string to thread from the bottom hole, then thread each arc at the top. A rolled paper straw in the middle keeps the ball fully inflated. A scalloped circle finishes the top and bottom and the beads are optional. Version 2 allows you to combine two different papers, of course.

Part 4 of upcoming Valentine collection on Etsy.

Jan 11, 2012

Yin Yang Valentine Card


I originally designed this card as a wedding invitation for dear friends. I wanted to give a subtle nod to their Asian background.

The interlocking Yin Yang design with Japanese flower motif opens up to reveal two interlocking hearts and a message for your Valentine. Overlapping two different colors of paper allows you to customize this card for weddings or anniversaries as well.

Part 3 of my Valentine collection, soon to be released on Etsy.

Jan 7, 2012

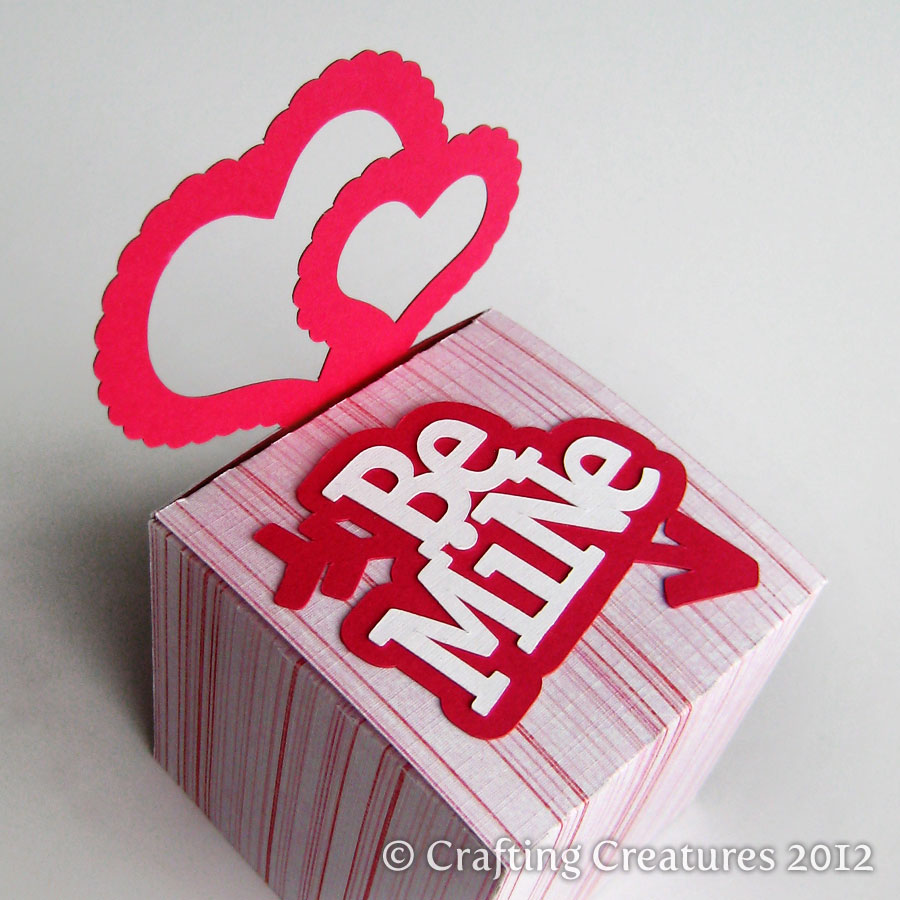
Valentine Hearts Gift Box


Classic cube with overlapping scallop-edged hearts. Simple and quick to make, this box can also be used for weddings or anniversaries. Who says Valentine's Day is just one day of the year?

Part 2 of upcoming Valentine's Day collection, soon to be offered on my Etsy store.

Jan 5, 2012

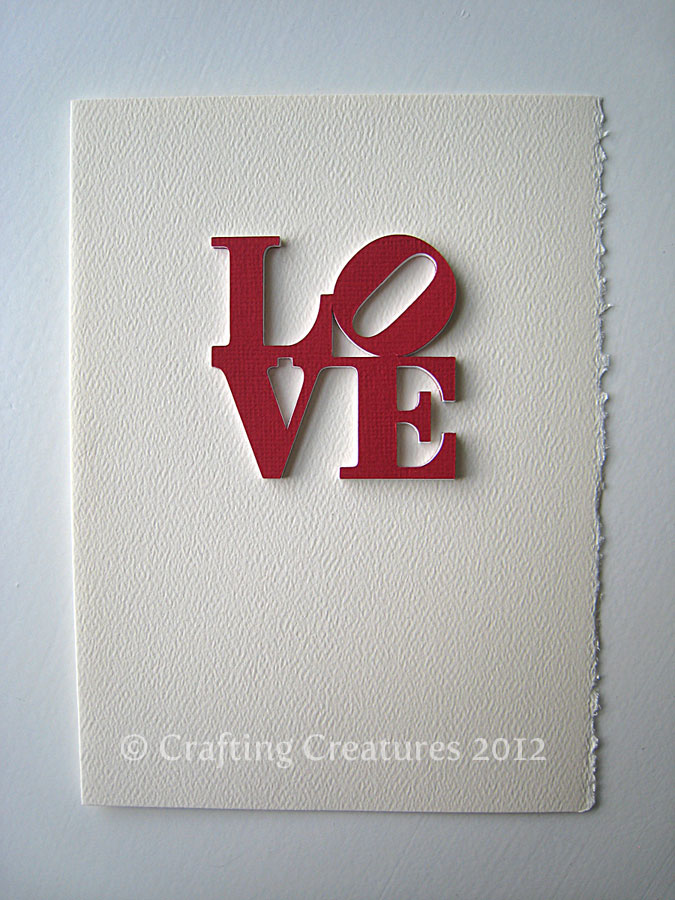
DIY Custom Chipboard Letters


I've heard of scrapbooks that rival the thickness of a New York hoagie. Perhaps it's because sandwiched in all the layers are dimensional chipboard letters lovingly decorated for each page; but what if you want your font, or your size, or your whatever?
 
I made this chipboard version of the famous LOVE sculpture, designed by Robert Indiana. After cutting out the paper on my Silhouette, I glued 8 layers of 80lb cover weight card stock together (6 white pieces sandwiched in between 2 red ones). It makes an intriguingly subtle effect when glued on cream stock because the white seems to have life of its own. Pinning in strategic corners onto corrugated cardboard allows you to keep them in register as you race before the glue dries.