Showing posts with label tutorial. Show all posts

Mar 31, 2020

3 Ways to Cut Quilling Strips by Hand - Free Pattern and Tutorial

cut quilling strips by hand - free pattern and template

3 Ways to Cut Quilling Strips by Hand

In my latest free tutorial, I’ll be showing you step-by-step, a couple of methods of how to cut your quilling strips by hand. Download my free printable PDF template. There’s also bonus that I’m sure any quiller will enjoy!


I've made the following widths for DIY Quilling Strips:

Inches: 1/16, 1/8, 1/4, 3/8, 1/2

Millimetre: 1, 2, 3, 5, 10


Quilling Paper Strips - Cut by Hand


Materials:

sharp craft knife (Method 1 + 2)
metal ruler (Method 1 + 2)
cutting mat (Method 1 + 2)
rotary cutter (Method 3)

Method 1 - Cut Quilling Strips with Margins

Print the template directly onto your paper. Cut from the printed line at the top to the bottom, leaving margins. These margins help keep your paper extremely tidy. 


Method 2 - Cutting without margins

If you don’t want to waste any scrap of paper, you can cut edge to edge. Print the template on regular paper and cut off both “rulers”. Tape these rulers to your cutting mat, leaving enough space for the full length of your paper in between. Cut edge to edge, with no wastage.
You would never want to print the markings onto your paper, and then cut all the way, because the markings would show on your quilling strips, and that just won’t do!


Method 3 - Rotary Cutter

Watch the video to see how to find your exact cutting edge. You'll also see how to make a jig for cutting the same strip width without needing to look at your markings at all. Discover how to make a fringe so you can trim off the excess markings.


Bonus

Type a message onto your quilling strip, then cut it out. Wrap a gift or start quilling with your customized ribbon. It’s like a message in a bottle!

Do you have any you’d like to share with everyone else? If so, I’d love to hear about it – please leave a comment below.


Apr 23, 2019

Quilling Curve Challenge - Day 7

7 Day Quilling Curve Challenge


Quilling Curve Challenge – Day 7

How have you improved your quilling in the past 7 days? 

Did you practice curving these 6 shapes using my 3 simple techniques? Did you see improvement? Were you able to achieve the smooth arcs more quickly?

In this video, I'm going to show you how to tackle the challenge using conventional quilling strips and a standard needle tool, just so you know you can do it regardless of type of paper or tools. Heck, you can even make shapes with a toothpick and ruled paper!


Download the PDF template, watch the video tutorial, then tag me #7dayquillingchallenge and/or @paperzen_cecelialouie – I'd love to see what you make!


Apr 16, 2019

Take the 7 Day Quilling Curve Challenge

7 Day Quilling Curve Challenge


7 Day Quilling Curve Challenge

I have a challenge for you – if you choose to accept it. 

Practice your quilling curves a few minutes a day for 7 days. Compare how you did on day 1 to day 7, and see how you’ve improved.

If you’ve watched any of my other videos and see how I tame my paper to follow curves and want to do the same, then this challenge is for you. Challenge other quillers you know and try practicing together.


7 Day Quilling Curve Challenge Worksheet

Jul 26, 2018

Quilling Lowercase Letter a and How to Quill a Peacock Feather Tutorial


Quilling Lowercase Letter a and How to Quill a Feather Tutorial

I have always found lowercase letters to be cuter than their uppercase counterparts. Uppercase letters tend to look more rigid and structured because of all the straight sides. But just because lowercase letters are cute, doesn’t mean it’s easier for quilling. It’s actually much more challenging to deal with all these curves.


Follow along with me in my latest video! Try quilling the Lowercase Letter a – download the free template.

In case you didn’t know, I also offer a free template for the upper case letter A.

You can watch it in another video called “Quilling Letter A - How to Outline”.

So if you haven’t tried quilling letters yet, what are you waiting for?


Also in this video, I'll be showing how tapering your ends gives your quilling strips a soft, feathering look that subtley fades away. The first time I ever made a strip "fade" was for some fireworks in a Mickey Mouse project.


After watching my video, please let me know what you think in the comments below. I want to know if you think it’s too difficult to deal with, or whether you’re really enjoying the look regardless of the effort. I haven’t written a book of lowercase letters yet, because I want to know if there’s enough interest first. To be honest with you, it takes a while for me to write a book of quilling patterns, and if I get 100 people telling me they want this, then I’m up to the challenge.

So, give it a try, let me know how it goes, and whether you’d like a book about lowercase letters! As always, your comments are what fuels me. I’m inspired by your feedback. I want to keep improving what I do. Tell me which tip is the one that’s new to you, or let me know what you’d like to see in future videos! Or ask me a question and I’ll try my best to answer!

Mar 9, 2018

How to Find the Right and Wrong Sides of Quilling Paper

How to find the Right and Wrong Sides of Quilling Paper - Which is wrong?

How do you find the right and wrong sides of quilling paper? 

It's barely noticeable, but your fingers will feel the slight downward facing edge created when a guillotine blade cuts down across all the sheets.
Can you spot the right and wrong sides of the coils, sitting side by side? 

How to find the Right and Wrong Sides of Quilling Paper - Wrong Side

In my latest YouTube video, I show how to spot the edges simply by shining light on the coils.

How to find the Right and Wrong Sides of Quilling Paper - S Scroll

And after all the microscopic investigation, I'd like to ask you, “Does it matter?” 
My answer would be, “Only if it bothers you.” 
If you can’t see or feel it, then I would suggest you don’t worry about it. Most non-quillers are too busy enjoying the overall quilling piece. Besides, when you quill an S-scroll, you’re faced with both a right and wrong side, and there’s not much you can do about that.

Feb 23, 2018

Quilling Letter O Tutorial - Wreath

Quilling letter O tutorial

How to join two quilling strip ends when there is no corner

For me, the letter O is the hardest letter of the alphabet because there are no corners or straight sides to hide the join. In this tutorial video, I'll share my techniques for making seamless join.

Feb 13, 2018

Quilling Letters M+N - Multi-Strip Scrolls

Quilling Letters M and N - Multi-Strip Scroll Tutorial and Pattern - Valentine Card

Multi-strip scrolls are mesmerizing! The quilling strips seem to magically widen and taper as if it's one strip. 

Feb 2, 2018

Quilling Letter K - Negative Spaces

quilling tutorial letter k

We often overlook the negative space of a letter, which is as important as the positive space.


Watch how to easily outline a letter by creating a "fence" for the negative space.


quilling template

Download the template to make your own 6x6 inch "fence", and replace the letter K with any letter from my book, Quilling Letters.


Quillling_Letters_Cecelia_Louie

Dec 20, 2017

Quilling Letters Tutorial - DEF (how to quill a name or word)

Quilling Letters DEF Tutorial Pattern PDF Book #quilling #typography #tutorial #paper #letters

The outlining of letters D, E, and F are somewhat covered by the tutorial techniques shown in my previous videos of A, B, and C. To ensure I don't waste your time repeating myself, this tutorial will show how to bring the letters together to form a word (even though DEF isn't quite a word, unless you're Def Leppard), the same way I did for the cover of my e-book, Quilling Letters. I'm sure you can expand upon what I'm showing to make any name or word, or even a phrase.


Quilling Letters Tutorial Pattern

After printing the outlined letters, use a pencil (and lots of eraser) to draw arcs on top of the template, connecting the letters to give the whole piece cohesiveness. The letters E and F only have straight sides, so I made sure to give them many swirls to soften them up a bit. Going outside the lines of the letters is fun too, and to me, it kind of says "quilling can't be contained!"


Nov 15, 2017

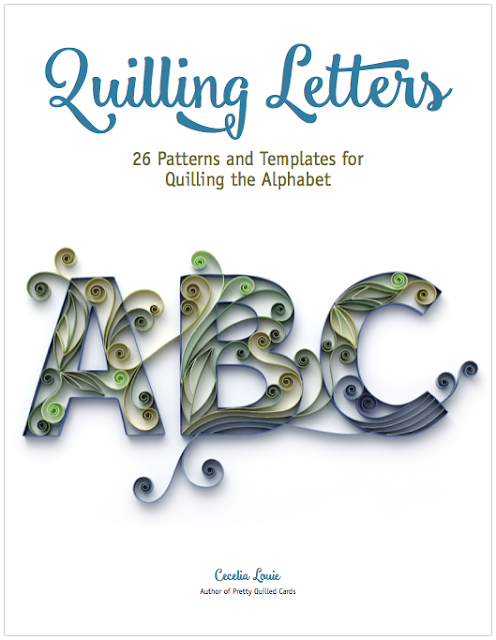
Quilling Letters E-book, 26 Patterns and Templates for Quilling the Alphabet

Quillling_Letters_Cecelia_Louie

I'm excited to introduce my new e-book, Quilling Letters! I have watched quilling typography projects gain in popularity with each passing year, and hope my book will help you in your next letter masterpiece.

Sep 28, 2016

Paper Quilling Letter E

how to paper quilling letter monogram tutorial typography

Try, try, and try again. Just so everyone understands – this is not exactly "easy". However, just like any quilling project, it's really quite amazing when you're done, so it's worth the effort. Just as Goldilocks critiqued, the first E's vertical strip on the left was too short, the next was too long, and the third seemed just right.


The paper I used is Canson Mi-Teintes (160 gsm) cut to 1/4" width. 

If you'd like to try quilling this letter, download my free PDF templateand give it a shot. I even filmed a video showing the entire process. I'm still new to filming videos, so if you like it, I hope you'll give it a thumbs up and leave a comment so I can keep improving.
 
Thank you all for being a part of this learning process with me. All your encouraging blog comments, likes, shares, and follows feed energy back to me.

Cecelia

Jun 17, 2016

Tutorial - How to Re-stick a Cutting Mat


how to make cutting mat sticky again


I've had a collection of dying, dead, and really dead cutting mats in my drawers ever since I bought my first electric cutting machine, a Silhouette SD.  They have been waiting there all these years for a resurrection because I loathe trashing plastic and knew I'd find a method of re-applying an adhesive that I'd like some day, and that day is here.

I have tried using 2-way Zig glue, but found residue on my paper, even after it had dried for days. I tried using large sheets of double-sided adhesive (courtesy of a local signage store who was throwing it out), but I would inevitably cut through that layer and would end up having to peel it off my own cut pieces. A friend showed me a video of someone diluting Aleene's Tack It Over and Over Again with water and brushing it onto her mat.


I decided it give it a try, but without dilution nor a brush. I wanted to smear the glue, just like I always do when I'm quilling. I was so pleased to see it work so well! I was able to re-use my mats and no adhesive came away with my paper. The adhesive is smooth and grips card stock almost too well.

how to make cutting mat sticky again

On my first attempt, I didn't realize the thickness of the masking tape would end up yielding a much thicker area than the middle. It ended up gripping my card stock so strongly that I left pulp behind. With the photo above, you can see the reflection of where the build up of adhesive is, near the tape. In my video, I have deliberately scraped harder so it has much less strength. It still grips card stock very well, but now it doesn't separate the fibers – love it!


After filming, I had some dried glue on my fingers. I happened to have some rubbing alcohol on hand, and found it to be as effective as the Goo Gone I've seen others use.

If you give it a try, I'd love to hear about it. Please do leave a comment and let others learn from your experience too!

Jan 14, 2016

Quilling Letters 101 - Part 7 Quilling a Word


I've sometimes heard people say they're intimidated to try quilling. My gut reaction is to say "WHAT?!?". Then I want to grab a round toothpick, tear a scrap piece of paper from the weekly flyers, and show them there is no cost to trying it once, to see if they like it. Like introducing someone to new food, I'm hoping their eyebrows go up and then they're diving in for another bite - there is no better happiness for me than someone else sharing your love. Like a magician who demystifies a simple, yet seemingly incredulous trick, I want to entice them into my world and fall in love with paper in a way they didn't know was possible. To me, it's simply PLAYING!

Now I'd like to admit something. I've wanted to quill something like this BE-YOU-TIFUL type for a very long time, but had so many negative voices in my head, or what sounded like good reasons to me, but were really excuses not to attempt this project. Then I slowly came to realize I was intimidated, just like those who were hesitant to try quilling! I finally came around, had fun doing it, and sharing it along the way – the good, the bad, and the ugly gluey bits.

To help me get to this state of mind and acceptance of myself at this point in time, I have been watching Liz Gilbert on Oprah. For me, it was pivotal. Liz says about perfectionism: "It's just fear in really good shoes". So with this series, I hoped to show more of what I struggled with, what I knew, where I had my doubts, so that you can all see more than just the end of the journey, when all the glue bits are cleaned away. I realize it may appear to magically come about, but in reality, I'm working hard at it too, so don't give up when you're frustrated that it's not going as you planned.

quilling letters
At this first stage, the letters were complete, and I started on the fluid arcs. It was so exciting to imagine what it could be. I really liked the bright yellow contrasting the violet, and committed to some key strokes because I knew I wanted the eye to flow the way it's shown here. The YOU letters were asymmetrical, and I wanted to balance it with the entire word, hence the longer stroke to the right.

I wanted movement and vibrancy to come bursting out of YOU, as if it were your personality being let free, and allowed to flourish, breaking the boundaries at the tops of the letters.

At this point, I had to glue down the arcs because as I kept adding without gluing, the strips were colliding with one another and knocking each other over like dominoes. So I basically committed to this skeletal structure.

quilling letters
Then I hit a wall, at the awkward, teenage phase, when it was too late to undo some core elements. The right hand stroke that I initially loved so much was irritatingly limiting because it constrained the area and didn't allow more arcs to come out of the other half of the U.

At this point, I wanted to scrap it, and start over. The arcs within the O were too even. The bottoms of the letters were not flowing with one another, like they were on top. I realized I should have pre-planned the fluidity between the letters better. The Y-O-U felt like individual letters, not a word in itself.

Each morning I'd look at this and wonder how to make it work. I'd try strip after strip, varying the colors or the strokes, and really felt in doubt about it all. I couldn't commit to gluing another strip for days and tried endless combinations, in full doubt of what I was doing. I wanted to end this series of posts without showing the final word, because I never promised I was going to explain that part anyway – you know, just in case my fears were realized and it didn't turn out well, so my embarrassment would never be public.

quilling letters
Finally, a solution came to me. I continued some arcs along the bottom, so the play could continue. Now I feel like it's an inspiring idea coming into a person, and that person letting it loose, watching it grow into something beautiful.

It's not perfect and I can see so many areas I want to improve, but as Liz says, it's better to have something "good" finished, rather than something wanting to be "perfect" stuck in my drawer. I have learned so much in doing this project, and that is the part I will treasure as I look at this piece on my wall.

Thank you all for coming along on this ride with me. Believe me, I understand the intimidation. Gluing the letters, while technically challenging, was not intimidating to me, because it's mainly production after choosing the size and font. Gluing the airy arcs, balancing the colors, the lengths, which ones would come out of the letters, etc - that was the intimidating part because I can't very well erase and start over again. Gluing the arcs down was a commitment – after all, the word was an investment of so much time. I'm glad I struggled through it, trying idea after idea to come up with a solution that felt ok.

If you've just started reading this post, you might enjoy the other parts of this series:
Has anyone tried my free letter B quilling template? Or one of your own? I'd love to see or hear about it!


I hope you are inspired to try something new with this series of posts, and go beyond your safety zone. Let go of your fears, and be YOU!


I'm grateful to all of you who comment and give your feedback. Your helpful insights help me grow!

Cecelia

Dec 15, 2015

Quilling Letters 101 - Part 4 Gluing Letters in Stages

Quilling Letters 101 - Part 4 Gluing Letters in Stages

The next letter I'm quilling is the capital letter E. Although I try to form my letter as accurately to the final setting as possible, there's no way I can simply glue the letter E without it being misshapen. Fighting the letter is like herding cats, so rather than do that, I'm going to glue it in stages.

First I lay down a bead of glue about the length of the long vertical piece of the letter E.

Quilling Letters 101 - Part 4 Gluing Letters in Stages

After dipping in the glue, I will turn it over and check for missing spots – like the area near the right. So I will re-dip in glue until the entire length is coated (the glue shown on this letter is a bit heavy, but I left it like this so it shows up better in the photos for you).

Quilling Letters 101 - Part 4 Gluing Letters in Stages

I glued the left side down first because it seemed to give the most leeway in dealing with the rest of the letter.

Don't pick it up like I'm showing here! I'm exaggerating it so you can see how much flexibility there is in dealing with the unglued parts.

Quilling Letters 101 - Part 4 Gluing Letters in Stages

Next, place glue on a scrap strip and slide it under the letter portion you'd like to glue. Using tweezers to pick up the unglued letter portions here is very handy. Dab the letter onto the glue and set the letter in place. Repeat this, gluing section, by section. You are in control every step of the way and have time to loosen your shoulders too!

Quilling Letters 101 - Part 4 Gluing Letters in Stages


When I reached the end and had to glue the corner, I pushed the left strip aside using my tweezers.

Quilling Letters 101 - Part 4 Gluing Letters in Stages


Dab glue along the end and bring the two corners together.

Note: apply less glue than I've shown here so you're not transferring a soggy blob. When I'm taking photos in my light tent, my back is tired from hunching over shot after shot, so I have less patience with my techniques than I show here.

Quilling Letters 101 - Part 4 Gluing Letters in Stages

Finally I slide a straight edge against the corner to ensure the seams are lined up.

The paper shown here is Canson Mi-Tientes, #507 Violet, 160 gsm, 1/4" wide.


Quilling the Letter B is easy with my free template!

Quilling Letters 101 - Part 4 Gluing Letters in Stages

I hope these tips help you quill your own letters. Please let me know how your progress is going in the comment section!

Jul 18, 2014

Quilled Champagne Congratulations, A New Tutorial Pattern!


My friends got engaged and I wanted to quill them something to commemorate the happy occasion. Champagne glasses immediately came to mind and then I wondered what to put around the clinking glasses — confetti and streamers of course!


I think of pink for a rosy congratulations, whether for a graduation or even an invite to "eat, drink, and be merry". The example shown here has the pink dots ready-to-print along with the frame.


For a classic golden hue, great for an anniversary or to give to your spouse, you can choose to hole punch your own paper out of 1/8" (shown here) or 1/16" hole punch.


As you can see, there are two frame options available, and both come with and without pink bubbles, so you can choose whatever you like. Both have a ribbon along to bottom so you can type whatever message you like. After scoring and trimming, your finished card will be 4.5x6.25 inches when folded.


Of course, it's not complete until you've assembled a customized envelope in matching font as well.

As with all my quilling tutorial patterns, you won't need a ruler to measure the strips needed. Simply lay your strip on top and score/fold along the indicated lines. Then follow the illustrations and photos to see how they are easily assembled.


If you'd prefer a different size of card or don't want the frames, it's easy to make a few more pieces of confetti to throw around it. I like gluing my confetti at different angles so it really looks like it's fluttering around.


This latest quilling pattern is available in my Etsy shop (10% coupon code is in the caption below). I hope you have a wonderful weekend full of paper scraps on the floor.


I can finally buy my quilling supplies locally, at Precious Memories! They sold out of my book at my first ever quilling demo the other night. My nervousness was completed dispelled by the enthusiastic attendees.

I'd like to celebrate (pun intended) my achievement with a 10% coupon for my Etsy shop. Just enter CONGRATS10 (expires July 31) during your checkout.


Craft Ideas is hosting a giveaway of my book! 3 lucky winners will receive a copy if they enter before 9/30/2014.

Jun 29, 2014

Quilling an Easy Letter Monogram


One question I'm commonly asked is how to make a quilled monogram. When someone is new to quilling, it is daunting to make such a large customized project, especially when they want it to be done in an afternoon.

Rather than tackling how to outline a letter (an advanced technique I plan to discuss later), I want to show a quick and easy way to make a monogram for room décor. This letter M has been covered by 3 types of quilled dots/circles. You can certainly minimize the design with a single type, but I wanted to show various ways of making circles out of quilling strips.


Before cutting my materials, I gather them to ensure they go well together. Here's what I used:
  • Green patterned paper from DCWV Doodlin' Around Stack
  • Metallic bronze card stock from Stardream
  • Orange paper from Daiso (a local dollar store with Japanese items)
  • Light blue quilling strips
  • Ikea 9x9 picture frame


Choose any font you wish, type your letter at about 4.25" high, and print it out. The font shown here is TeX Gyre Bonum, Bold, with a size of 450 pt. Staple it on top of your card stock to prevent the papers from shifting as you cut.


Tight Coil
To make these solid dots, I used 3.5" long strips and started my needle tool partway down from the top edge. Rubbing my fingers as if I'm removing dried glue, I roll the paper up and around the tool. If the paper doesn't catch around your needle, moisten your fingertip. After applying glue to seal the end, push the coil off your tool. At this stage, I can see my edges are not perfectly aligned, so I place the coil on my work surface and use a flat item to squish the coils completely flush. You will see a solid coil on top, while the bottom has a tiny hole.


Loose Coil
To make the Loose Coils, I curled a 3.5" strip around my tool and released it within an 8 mm (about .25") diameter circle template. I place adhesive foam beneath my circle template to raise the template about midway up the paper strip, keeping it more easily fenced in.


When I swipe up a dab of glue with my needle tool, it's usually facing one direction. See how there is a clean area on the opposite side? Look at the previous photo again. You'll see I use this clean section to push my coils out of the way before dabbing my glue on the end. I usually have tissues nearby to clean off my tool each time. Toothpicks could certainly be used instead of gunking up your tool, but I prefer not interrupting my flow by picking and putting down my tools.


Rings
To make the large circles, I found using the circle template harder than wrapping around a solid object, in this case, a Scotch Quick-Dry Adhesive bottle. The circle on the left is just a tad out of shape. Perhaps a lipstick tube would work too – anything with a plastic surface allows me to slip the finished ring off more easily.


To start, I scraped a 5" length strip. The top left in the photo above shows what a scraped coil looks like. I ended up with a circumference of about 16mm or .5". The size does not have to be exact, just whatever you have around that makes a larger circle.


Wrap the coil around your object to eyeball a general length.


You don't want glue on the innermost ring - just the length after that. I used a UHU glue stick to smear the adhesive rather than liquid glue.


Wrap the strip around your object, trying to keep the edges aligned.


While the glue is still moist, slip the ring off and use either your fingers or a flat object to gently press the rings flush. Actually, I rarely use my fingers, but each time I took a photo with a flat item, it covered up the quilling, so bear with me! Flush edges always makes your work look neater.

Then I slip the ring back on the glue bottle to allow the glue to fully dry, so I can achieve a perfectly round ring. 


I drew, then cut a giraffe and had intended to use matching bronze coils on top, but found them too distracting from the monogram. Instead I used 1/8" and 1/4" hole punches to punch matching bronze dots. I have used my punches for years and noticed the edges are not as clean as I'd like. To solve this, I put my paper in between two sheets of scrap card stock. Being sandwiched makes my bronze paper cut so much more cleanly.


After gluing the dots on my giraffe, I flipped it over and placed adhesive foam squares on the back. I enjoy the subtle shadows cast when an item is lifted off the page.


Make as many dots and circles as you need, and place them on your letter. To keep things random, I cut one of the large rings apart and glued the two sections in different parts of the letter.


Before gluing everything down, I suggest getting up from your chair and taking a break. Give it a day if you can. When you come back, you may see a different way of laying out the elements. I find myself subconsciously placing elements in the middle, so I keep playing with it until it looks random enough.


I plan to make this tutorial into a free downloadable PDF so it's easy to print and have by your craft table. The strips will all be pre-measured for you, as all my quilling patterns are. The giraffe will also be included in two ways - both as a pattern to cut out on your chosen paper and as a colored printable to save time. The eyes and antlers can get a bit tricky to cut, but you can replace it with any animal you prefer.

I've now completed the PDF file with measurements, instructions, photos, and giraffe template. I hope you'll leave a comment on my blog if it helped you make a customized project for your loved one!