Showing posts with label free. Show all posts
Showing posts with label free. Show all posts
Jun 25, 2019
Oct 8, 2015
How to make a Tiger Stripe Paper Pumpkin
This is a Tiger Stripe pumpkin which I found irresistible at the store. It’s fun to set this variegated pumpkin against the standard orange.
It's also fun to make your own. Using any of my free 3D pumpkin patterns, you can easily cut this fanned pumpkin out of parchment card stock.
Use an orange felt maker or ink pad to color the edges.
Use an old toothbrush and mix up some orange paint – and flick away!
There are 3 pumpkin shapes to download
Jun 25, 2014
3D Soccer Ball Birthday Card
My soccer-loving nephew has turned 12 and I thought it would be fun to make a card he could get a "kick" out of. He and his brother used to enjoy receiving extra pieces to make the exact card I made. Alas, they're growing up and it's getting harder to impress them. Luckily my readers are a more forgiving audience!
The soccer ball is made of a single piece of white cardstock that gets glued together. Then the black pieces are added afterwards. I added a springing coil of quilled paper to represent a bounce, and a torn green sheet for grass.
To assemble the ball follow the directions – the numbers match the image below:
1) fold along the dotted line and glue the grey triangle under the white pentagon; repeat 4 times.
2) fold the grey tab under the same white pentagon and glue; repeat 4 more times.
3) fold these remaining gray tabs over and glue to your card
The PDF version will have the black areas printed on the ball, so it's easier for hand assembly. The SVG version will have a perforated white outline with the black in separate pieces. These files are for personal use only. I'd love to hear if you gave it a try!
Download Soccer Ball PDF and SVG
Sep 22, 2013
Halloween Ghost - Party Favor Treat Gift Box
My favorite party favor of all time is this shape because it's quick & easy to make, has an unusual surface area for design, and holds a surprising amount of treats.
4 ghosts fill up a sheet of 8.5x11 inch paper efficiently, so there's very little waste. Remember to print "Fit to Page" so it maximizes the printing area.
Watch my updated video tutorial or read the assembly instructions below.
1) You will need also need scissors, 1/8" hole punch, double-sided tape, and about 6 inches of 1/8" width ribbon.
2) Flip over the ghost. Place double-sided tape along the left edge and along the top right as shown by the arrows. Remove a small portion of the wax along the left and fold it down (do not remove all the wax yet).
3) Keeping your fingers on the waxed portion, roll the ghost into a tube, overlapping the gray diagonal lines. When it's aligned and straight, press the exposed adhesive. Gently pull more wax off, then press to adhere. Repeat until you have a completed tube.
4) Remove all the wax from the end of the tube.
5) Guided by the small gray line, pinch the top end closed.
6) Guided by the two small gray lines at the bottom end, pinch closed, then fold the end over toward the back. Unfold and fill with treats.
7) Punch a hole in the bottom middle. Fold your ribbon in half and thread it through partway. Take the ribbon ends and thread it through the folded ribbon, then pull until taut.
8) You're ready for a boo-tyful night of tricks and treats!
If you'd like to make your own for a wedding or other occasion, I have a template and examples in a previous DIY post: http://paperzen.blogspot.ca/2011/01/diy-party-favor.html
If you enjoyed making this pattern and would like to make more, I have 4 more patterns (witch, mummy, candy corn, and frankenstein) in my shop.
Jun 13, 2013
Monster Bookmark - Free Die Cut (SVG, DXF, PDF)
I'm showing Ann Martin's book, All Things Paper, to family and friends, and as I flip to my project in I realized I could simplify my life with a bookmark.
Download a free compressed file containing SVG, DXF, and PDF files for personal use. Please leave me a comment if you have some time - I love hearing if you're inspired to make something.
Dec 17, 2012
3D Ornament Gift Tag
I've seen many wonderful 3D ball ornaments and thought it might also make a great gift tag. It's also a great way to use up small scraps of left over paper.
It's super easy to make. Just fold your circle/ornament in half and glue about 5 various colors to each other, then to the tag. The best part is that it's easy to re-fluff back up if it's been squashed by another gift.
Have a happy crafting season everyone!
It's super easy to make. Just fold your circle/ornament in half and glue about 5 various colors to each other, then to the tag. The best part is that it's easy to re-fluff back up if it's been squashed by another gift.
Have a happy crafting season everyone!
Mar 28, 2012
Quilling Flower Pattern Update
3 years ago I offered my open style quilling flower patterns on Etsy. I’ve wanted to update this tutorial for quite some time and have finally been able to finish this project. What’s new? Double petals, stamens, larger and smaller flowers, 8 petal flowers, and a super easy-peasy guide for measuring each strip. For those who dislike reading manuals, there are more step-by-step photos to show each stage. The new quilling tutorial/pattern will still be $5. All 2012 purchasers will receive the new pattern free. Clients up to Dec 31, 2011 will be emailed a coupon code for a 50% discount.
I’ve had such positive response over my previous “heart full o flowers” that I chose to do it again, but bigger to show off all the flower types. I used 2 strips of 11″ Bazzil scrapbook paper because it’s thick – I prefer to have a stronger “fence” as I filled in the elements. Here are some stages as I went along. I started at the bottom and just nestled some next to one another, seeing what fit in terms of size, color, and style. Loose scrolls would be added after to fill in some blank areas too small for flowers. The final size is about 5″ x 6″.
My previous PDF pattern included 5 card designs to be used as backgrounds and 1 envelope. I’ve decided to offer these printables for free on my blog. Download here. Your feedback keeps me going – thank you!
Dec 9, 2011
3D Paper Star for Xmas Tree Topper (FREE SVG, DXF, PDF)
I didn't have a tree topper and was inspired after seeing how easy it was to make a 3D paper star on Kim's blog, Craftaphile. I added a stem and it seemed like I planned how well it fit on that topmost tree tip. The actual size is about 7.5" wide x 9.5" high.
I'm offering my die cut files free. I'd love to hear your comments like how it cut for you on your machine. The file formats are in SVG, DXF, and PDF (cutting by hand is also easy). They are all compressed into a ZIP file for you to download.
You'll notice there's a "front" and "back", but really it's just one has tabs and the other doesn't. I pre-fold along all the lines (Craftaphile shows great photos) then use white glue and work with 2 tabs at a time, holding until the glue sets. After it's assembled, the creases remember where they need to move and it just poofs out into 3D! Try it!
Jan 26, 2011
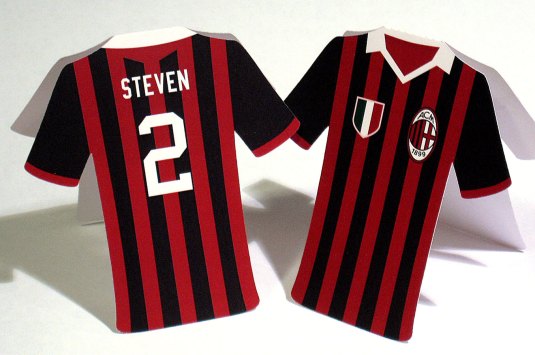
DIY Soccer Jersey Placecard
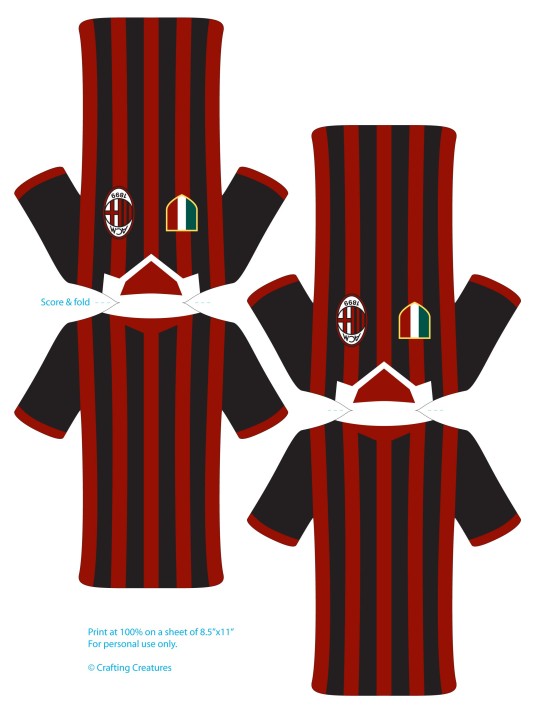
Since blogging about the soccer themed place cards made for my nephew’s baptism, I’ve been asked about them numerous times. I used an electronic die cutter (Silhouette) to cut them out, but there’s no reason why it can’t be done by hand.
I’ve made a PDF with fillable name and number to print out. You can cut them by hand or use the SVG files on your electronic cutter (Cricut or Silhouette with Designer software).
Please credit my blog and I’d love it if you could comment with a link to your blog or a photo of how your project looks. Your enthusiasm keeps me inspired!
Jan 25, 2011
DIY Party Favor
Finally edited the remaining photos from our nephew’s soccer themed baptism. This is such an easy to make party favor. I remember savoring hickory smoked almonds on an airplane and the wedge shape has always stuck in my head because of it’s minimalism. It uses the least amount of paper, provides maximum amount of volume, yet requires the least amount of effort to make by hand. There are no tabs to cut as for boxes, the shape is very pleasing and unusual, and provides a nice surface for a message.
I bought my translucent vellum at Opus on Granville Island: .50/sheet (discount over 10 sheets), at 48lb. Other options I considered were:
- DeSerres: $8.95 at 32 Text weight (too thin)
- Avalon Stationary: .70/each, 80lb Cover weight (too thick)
- Coast Paper Cash and Carry: minimum $25 (too much stock left over)
To make the party favor:
- Cut a sheet of 8.5″x11″ into quarters. Wrap the length around an empty toilet paper roll to help you line up the edges, and use double sided tape or glue to adhere the overlap.
- Pinch the top opening.
- Adhere one end of the tube.
- Pinch the other opening in a perpendicular direction.
- Fold over edge.
- Use a 1/8″ hole punch in the middle for a ribbon.
Jan 12, 2011
Die Cut Jersey Place Cards
These place cards were cut in the shape of soccer jerseys, with each name and table number showing the guests their seating.
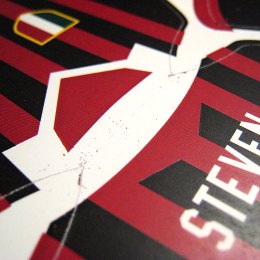
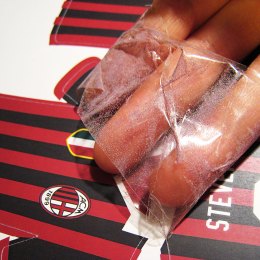
A hazard of printing all the way to the cutting edge on coated card stock is powdered toner flaking off. A nice way to pick up all the toner is to wrap packaging tape around your hand with the sticky side out. Gently skim the surface of your paper, picking up the toner before it has a chance to coat the adhesive mat of your die cutter, thereby ruining future adhesion. Note to self: leave a white margin next time!
If you’d like to cut these jerseys, here are links for a fillable PDF (yes, it'll look just like the font you see here), SVG, and DXF file.
Feb 10, 2010
Quilled Snowflakes
Amazing what I find when cleaning out my hard drive. I’d forgotten all about these fun flakes I made two years ago. I placed on top of cork board, covered in Saran/cling wrap, then use sewing pins to hold elements in place. The glue releases cleanly from the plastic.
Subscribe to:
Posts (Atom)


