Ever since I made my first ATC, I've been wanting to make a practical, useful version.
I usually cut the pupil and iris out of card stock, then the lashes from paper. This makes it easy to fluff up the lashes against a stiff circle. For this example I chose to cut the iris and reflective shine from vinyl.
If you have difficulty lining up vinyl, here's what I do. After weeding out the unwanted vinyl, I peel back the wax and cut some off, leaving part of the adhesive exposed. I hold the vinyl (waxed area) and paper against the light. This lets you see all the layers to center the circles. Once you like the placement, press the sticky area and remove the remaining wax - and voilà, centered circles!
My 3D owl box is now available in my shop. Hope you have a hoot making these!
I have been having so much fun with my owl boxes that I can't stop making new colors.
The first blue/green color choice was inspired by my nephews. This bonus pink/orange version has now been added to the Etsy listing.
I couldn't leave my grey Halloween owl alone, so have paired him with the classic snowy white owl, like Hedwig from Harry Potter.
You can type whatever message is needed on the back to customize it for your party. I designed this pattern to be easily cuttable by hand, but for those who prefer a cutting file version, it's coming soon!
My favorite party favor of all time is this shape because it's quick & easy to make, has an unusual surface area for design, and holds a surprising amount of treats.
4 ghosts fill up a sheet of 8.5x11 inch paper efficiently, so there's very little waste. Remember to print "Fit to Page" so it maximizes the printing area.
Watch my updated video tutorial or read the assembly instructions below.
1) You will need also need scissors, 1/8" hole punch, double-sided tape, and about 6 inches of 1/8" width ribbon.
2) Flip over the ghost. Place double-sided tape along the left edge and along the top right as shown by the arrows. Remove a small portion of the wax along the left and fold it down (do not remove all the wax yet).
3) Keeping your fingers on the waxed portion, roll the ghost into a tube, overlapping the gray diagonal lines. When it's aligned and straight, press the exposed adhesive. Gently pull more wax off, then press to adhere. Repeat until you have a completed tube.
4) Remove all the wax from the end of the tube.
5) Guided by the small gray line, pinch the top end closed.
6) Guided by the two small gray lines at the bottom end, pinch closed, then fold the end over toward the back. Unfold and fill with treats.
7) Punch a hole in the bottom middle. Fold your ribbon in half and thread it through partway. Take the ribbon ends and thread it through the folded ribbon, then pull until taut.
8) You're ready for a boo-tyful night of tricks and treats!
If you'd like to make your own for a wedding or other occasion, I have a template and examples in a previous DIY post: http://paperzen.blogspot.ca/2011/01/diy-party-favor.html
If you enjoyed making this pattern and would like to make more, I have 4 more patterns (witch, mummy, candy corn, and frankenstein) in my shop.
My bride and groom boxes are on Etsy now! I had to slow down the horses until I finished adding photos of new bows I added to the brides. How can the guys be more decorative than the girls? They're held obediently in place with double-sided tape and guests won't have a problem accessing the treats because they can still open the box from the bottom. I hope I get to see my box designs decorating someone's party one day!
I have a sweet couple of boxes that are almost ready to launch. They took some time to figure out because I wanted to incorporate specific details. I thought I would share a bit of my process here.
I knew I wanted a fuller bridal gown, more ball-like rather than square, the stuff of little girls' dreams. So a hexagon shape was my base, and you can see the progression as the bodice took shape.
I wanted to offer two types of dresses, so chose a straight and crossed style. Having two to choose from means you can have bridesmaids for a shower.
For the guys, I sculpted broad shoulders from a tuxedo that assembles without glue. Again, two different styles - a Windsor knot tie (love that crimp) and a bow tie (not a shoelace method). I couldn't resist a matching hanky in the pocket. I love putting time into small details like this.
These aren't limited to wedding couples. I had quite a smirk on my face making Anastasia Steele's plum dress and Christian Grey's tie, perfect for a 50 Shades of Grey party.
Does this set of new boxes make you think of other occasions?
*** Update *** The boxes are now in my Etsy store ***
Although I'm more of a tomboy than a girly-girl, I did save every wedding party favor as a little girl, dreaming of the day I would marry my sweetheart. I don't know why I have such a thing for boxes, but I do love how it's hiding a small surprise. The ones I love most serve double purpose, whether to be decorative or in this case, to show a guest to their seat.
I used a heavyweight vellum which allows the damask pattern to be seen yet not obstruct the guest's name. A square tag is glued to the front, with a couple's special day and message.
The 1.75" cube has a chair backing that is 4.25" tall. Two boxes can be cut from a single sheet of 11 x 8.5" paper. In this example I've used Silver Stardream cardstock. The font used here is Great Vibes.
Damask patterns have always been used in classic decor in such a broad range, and I struggled for quite some time to have the design be strong enough to hold the name tag. I also think it looks just as complete without the name tag, so it's perfect for occasions other than weddings.
My Damask Chair Box is now available in my Etsy store for instant download. I've saved the files in SVG, DXF, MTC, and PDF formats. Thanks so much for your kind comments!
Open, says me! I can finally open up and share more about my Mysterious Stationery Box, which was included in Ann Martin's wonderful book, All Things Paper. Being the eagle-eyed blogger she is, Ann was able to call upon creatives all around the world who work with paper, and showcase just how versatile paper can be.
My project is based on a common Japanese box (Karakuri Bako), which is traditionally made of wood and fabric to hold jewelry in evenly divided compartments. The mystery behind it is how the lid is double-hinged, allowing it to reveal the main compartment (above), and the smaller side compartments (below).
I make the lid stay closed snugly by gluing panels that just friction-fit within the compartment. I shot a video showing how it works that I hope Tuttle will show it soon on their site. This isn't the first time making this box - actually I made it as my grad project while attending Emily Carr College so many years ago. I didn't have money to buy the best materials back then, so when Ann asked me to create this project, I have to admit I was eager to re-do it with proper materials.
Lineco Binder Board did exactly as advertised. Lineco's board scared me at first because after applying glue to most of the surface, it did bow, but flattened itself out as it dried (I used to apply Lineco glue to matte board, then pile on phone books and wait overnight).
In the photo below I'm protecting the compartment with scrap paper while applying glue to a tab with a brush, another splurge since college and one that I was so pleased with because it allowed me to control the amount of glue better than spreading with a credit card. The Japanese patterned paper is made by hand and I was assured it will not tear even with repeated use because of its long fibers.
This project can be daunting for beginners, but I hope it inspires you to look at paper as a strong structural component to your creations.
Another project in this book that caught my eye immediately was Allison Patrick's Phone Book Letter Holder. I love how she's given the diminished Yellow Pages a new life. Simple yet stylish, using materials around the house - my favorite combo.
Her thorough feedback was invaluable - especially as I learned that her Zing would cut notches where my lines didn't join - something that didn't show up on my Silhouette. Since scrapbooking is not my forté, I also loved seeing how she envisions my designs. It was her ink pad distressing that showed me how to give my 3D paper balls an extra pop, especially with the speeding arrows. To see more of Brigit's paper projects, visit her blog at: http://irishmist59.blogspot.com/
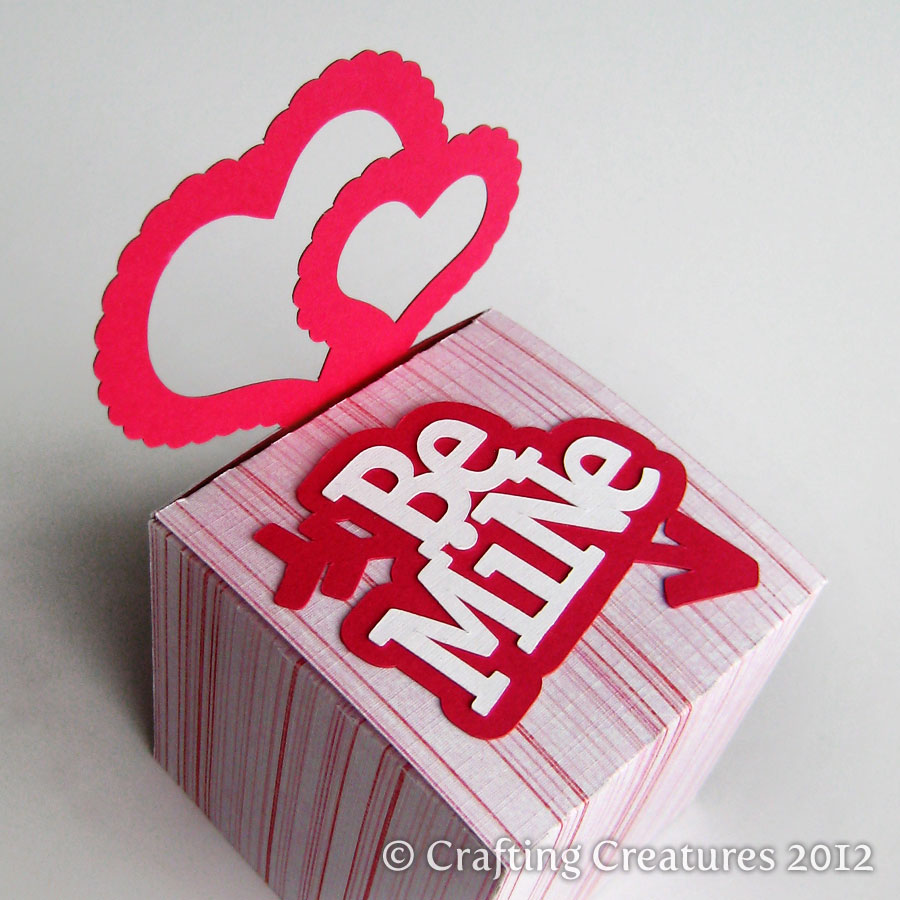
Classic cube with overlapping scallop-edged hearts. Simple and quick to make, this box can also be used for weddings or anniversaries. Who says Valentine's Day is just one day of the year?
Part 2 of upcoming Valentine's Day collection, soon to be offered on my Etsy store.
Need snow? Paint yourself a winter wonderland. Daiso sells pearlescent white paint for $2 in a small tube. Use a fine brush, load it up, and let the paint scrape against the edges of your craft project (in this case a party favor box).
Try to make it look like natural snow drift by painting from one direction (so don't coat every edge).
This triangular party favor box is sold on Etsy, along with other dinner party paper decor. Half-moon shaped flaps are on both ends to allow easy access to your stocking stuffer. Perfectly size for biscotti treats.
Paper Gift Box Die Cutting with SVG files and PDF instructions for Silhouette and Cricut Explore machines
I am so thankful for the time everyone offered me on the Make The Cut Forum. Below are some responses I got from my testers and the above photo taken by Brigit. I love the way she inset those panels and inked the edges of the tags - something I've only recently learned about.
Brigit (Zing): I love the design of your bow it's so pretty when put together, I used glue though. The pillow box I just did after the zing plugin and it cut perfectly, I love it, it went together so nicely, here they are.
Laurie (Cricut): have cut out three of the gift card boxes. The perferations work differently on different types of paper. It worked great on a doublesided 12x12 sheet. I used some solid regular card stock and it was much more difficult to fold the end flaps. But all in all they cut out great and are really neat little boxes. Such a great idea.
Pam (Pazzles Inspiration and the Pro software): Your bow worked out fine for me except that sometimes I'm a little fumbled fingered..lol I mainly create and design greeting cards and rarely do scrapbooking and when I cut your files, I actually used scrap papers that I had on hand. I cut the cube box using some GA Pacific White Card from Walmart and for the Pillow Box and Bow I just used some lightweight paper because I think those two items would be better cut from it than from cardstock. You are more than welcome to use my comments as they are quite nice cutting files!
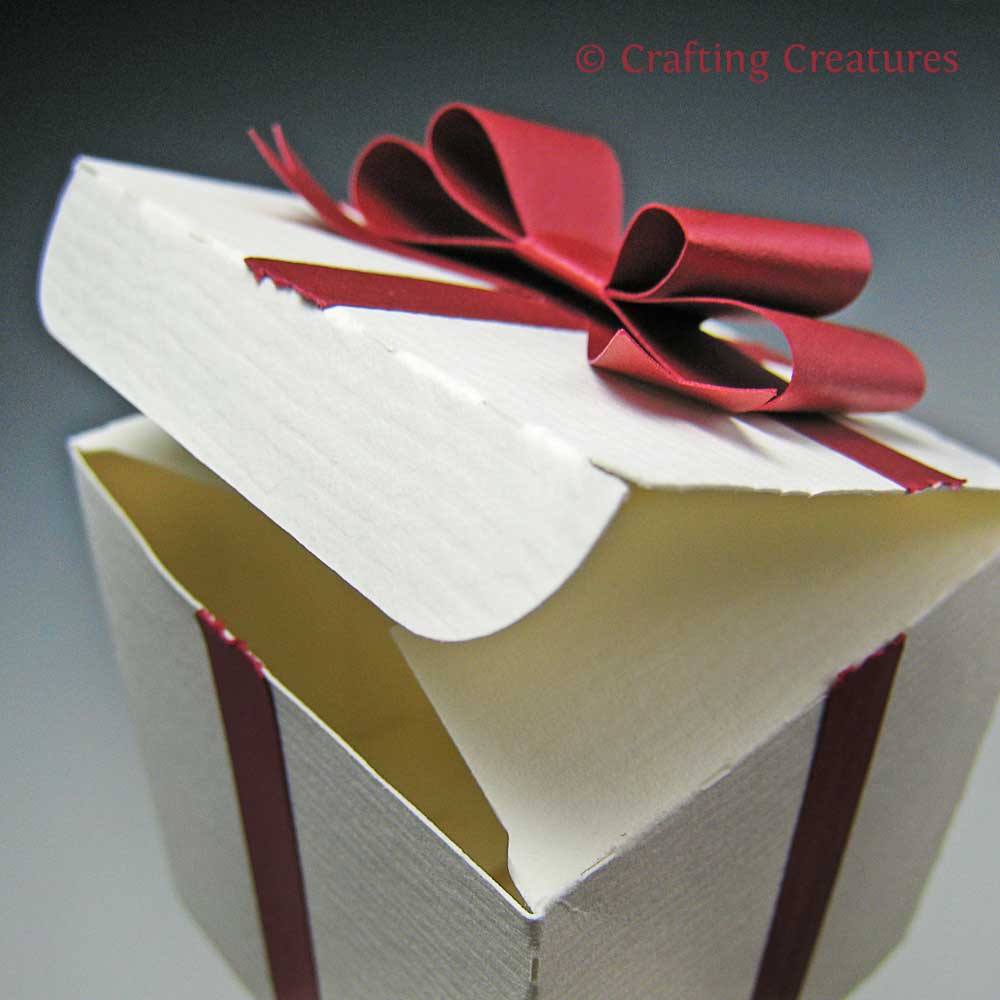
My nephews are old enough now to want gift cards, but young enough to still be curious about what's under the tree, so I designed a pillow box glued shut with a tear strip so they can "Let 'er rip!" on Xmas day. The handles separate so you can still add it last minute to wrapped box or easily hang it off the xmas tree branch.
I also designed my version of the perfect paper bow – never crushed, always centered, with just the right amount of tilt to the double loops, and no glue needed (my ode to origami masters) – and of course it's all one piece of paper. The box is also glued shut using the "ribbon" which is perforated for easy tearing. Stardream, Mars Red Metallic, 81# Text was used for this bow.
I'm selling these die cut patterns on Etsy along with two bonus gift tags that go with them. I've also had the great pleasure to meet a diverse group of skilled cutting crafters on http://forum.make-the-cut.com who have happily helped me test out my files on cutters other than my dear Silhouette. I'll be following up with a post of their comments and what papers they've used.
Who won the "What's inside the coffin contest?" No body. The answer is fish skeleton! Make no bones about it - I even put the answer in my Etsy listing! Please, no booing! Thank you all for playing! I had a screech :)
One more if you dare? Why couldn't Dracula's wife get to sleep? Because of his coffin.
OK so it wasn't hard to guess what was coming, but I hope you've enjoyed the unveiling of my die cut Halloween coffin boxes. This one has a spider web made of black vinyl hidden on the inside of the coffin's lid. A small length of fishing wire is attached to the spider so kids will get an extra hidden surprise as they reach for the goodies inside. I have always loved shiny black on matte, a subtle and entrancing effect.
Here are some of my prototypes. Can anyone guess what's inside? I'll give you a hint - it's white and emaciated. Please be very specific - only FULLY correct guesses will qualify.
I will email a free SVG or DXF spider file to anyone who guesses correctly by next Monday, Oct 10, 2011.
Scary movies know thrills are intensified by allowing your imagination go wild before they reveal the ending. Here's my teaser - stay tuned for more. Happy 1st of October!