Showing posts with label storage. Show all posts

Mar 23, 2018

How to Mail Quilling and Other Box Storage Ideas

How to Mail Quilled Cards

How to mail quilled cards

That's a question I get quite often. The very nature of quilling means we want to protect it from any rough handling, so how do you present or mail it to someone without ruining all your hard work?

Hand Delivering Quilled Cards

If I’m giving my card in person, I use a stiff jewelry box (affiliate link):
https://www.amazon.com/Cotton-Filled-Cardboard-Jewelry-Retail/dp/B078SFKHK9/ref=sr_1_2?ie=UTF8&qid=1521138565&sr=8-2&keywords=White+Cardboard+Jewelry+5x7

Mailing Quilling Box

Mailing Quilled Cards

The postal service is notably rough on packages. So I surround my jewelry box with crumpled paper, and put it inside a corrugated box. This way it has protection from conveyor belts, dropping, and other types of rough handling.

Divided Chocolate Box for Quilling Snowflakes

Divided Boxes for Quilling Components (ex. Snowflakes)

I save chocolate boxes because they have divided sections, and the cardboard is very stiff. A divided chocolate box comes in handy when you’re quilling component pieces like snowflakes. It’s shallow so it’s great to stack and label your work in progress. Best of all, it’s free!

CD Case for Quilling Storage

CD Cases for Quilled pieces

CD cases are great for storing quilling pieces that are too big for the divided chocolate boxes. They’re clear so you don’t have to guess what’s inside and they stack well. It’s not great for smaller pieces because they could fall out of the side area after you’ve removed the insert.

Stationery Box for Quilling Project Storage

Stationery Boxes for Large Quilled Projects

If you’re working on a large piece, stationery or filing boxes can be found at garage sales.


If you have ways of mailing or storing your quilling, please share your ideas with everyone in the comments below!

Sep 3, 2014

How to organize messy quilling strips


This "before" shot is so typical of our quilling supply box, isn't it?


Here it is all cleaned up (on the right hand side). Past blog readers may recall my quilling storage box custom made to fit my Ikea drawers. After inheriting Aunt Berni's quilling supplies, I realized I didn't have enough spare room in my box and needed to condense it in my existing box trays.

Dec 22, 2013

DIY Tape Storage


This is my DIY tape storage method. It holds two diameters of varying adhesive tape and both can easily be lifted out of the drawer.

2 in 1 is the best, isn't it?

The smaller roll lifts right out of the larger roll, which otherwise would be wasted space.

Here's how I made it:
1) Cut two pieces of foam core, 3.5" square and 2.5" diameter circle, for sturdy bases.
2) Trim chipboard card stock to fit your drawer depth. I trimmed mine from 8.5" to 7" width which then fit vertically in my 7.5" deep drawers.
3) Roll the card stock into a tube and release within a couple of the tape rolls (which gives you the perfect size). Glue/tape the edge to prevent further unraveling. Remove the rolls from the tube.
4) Coat the bottom edge with white glue and adhere to the foam core, pressing firmly. After it's dry, slip the rolls back on the tube and you're ready to get sticky with it.

If you happen to make this, I'd love to see your version!

Cecelia

Jun 29, 2013

Kite Ribbon Storage Hanger (SVG, DXF, PDF, MTC files)


I don't have ribbon fever, but I do save the ones I'm given with gifts because they are still re-usable for other gifts or even my cards.


I used to save the scraps in small plastic bags to keep them from fighting, but when I'd discover it wasn't long enough, I'd have to re-ravel it – or if it was right, I'd have to deal with all the kinks.


So I made my own with 4 layers of cardboard (the thickest my Silhouette can cut) and glued them together for strength and rigidity. You can also use poster board, chipboard, cardboard, even cereal boxes - whatever your machine or hand can cut. I added white vinyl to the two outer sides (before cutting) of my cardboard to give myself a neutral, white background, but I can imagine my kites and their ribboned tails against a light blue sky background too.


I love how the ribbons are stored with thicks and thins in orderly columns. Threading the ribbons through the 3 lines was quick to do, but also quick to remove too! They don't slide off (unlike my shirts on plastic hangers) and I can visually guage the length, color, width at a glance for my project. It now hangs in my craft room closet, kink-free!

I'm offering my Kite Ribbon Storage Hanger in the following formats: SVG, DXF, MTC, and PDF (for hand cutting if you prefer).

May 2, 2012

Quilling Paper Storage


I’m kinda late for an Earth Day posting, but better late than never.

I had a stack of plastic sleeves for negatives (remember those days?) that I couldn’t bear to toss in the landfill, so they took up space on my shelf for years. Now they are a valuable quilling strip organizer!

I used to have a box of half used strips that was more mangled than Medusa on a bad hair day. After detaching another new strip from the pack, I’d turn around and find I had a half used one I could have used up. Now I keep similar colors/weights on a page and they don’t argue with one another.

The block of pink you see on the far right (below) is a sheet I cut with my die cutter. I leave the ends intact so I snip off as I go. I find this method much easier than the lock of hair that has a life of its own.


Enlarge the thumbnails for a larger image.

1) You will need a 3 hole punched sheet of cardstock, plastic negative sheet, scissors, and double-sided tape.


2) Tape along 3 sides of the plastic sheet, avoiding the holes, which are placed towards the bottom of the page. The holes will be flipped to the back. My plastic sheet divider happens to line up right at the edge of my sheet, where it will be folded to the back. Peel the wax on the left and adhere to the page. Allow the holes to extend past the bottom of your page.


3) Flip over. Remove the tape near the holes and adhere.

4) Now strips will not fall out. Remove the remaining wax.

5) Add just one more strip of tape as indicated.


6) Adhere and you’re done.

Another storage method I use for quilled items I decided not to glue on a final project is a fish tackle box. I got this for under $7 at Canadian Tire. I like the blue dividers which allow me to decide the compartment size.

 What's your favorite storage method for quilling?

Oct 30, 2011

My New Craft Room


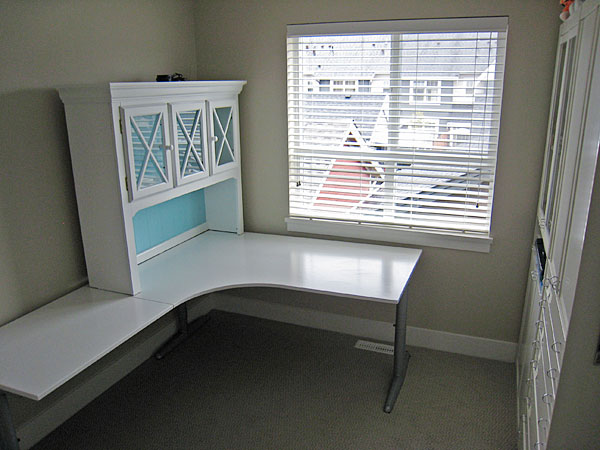
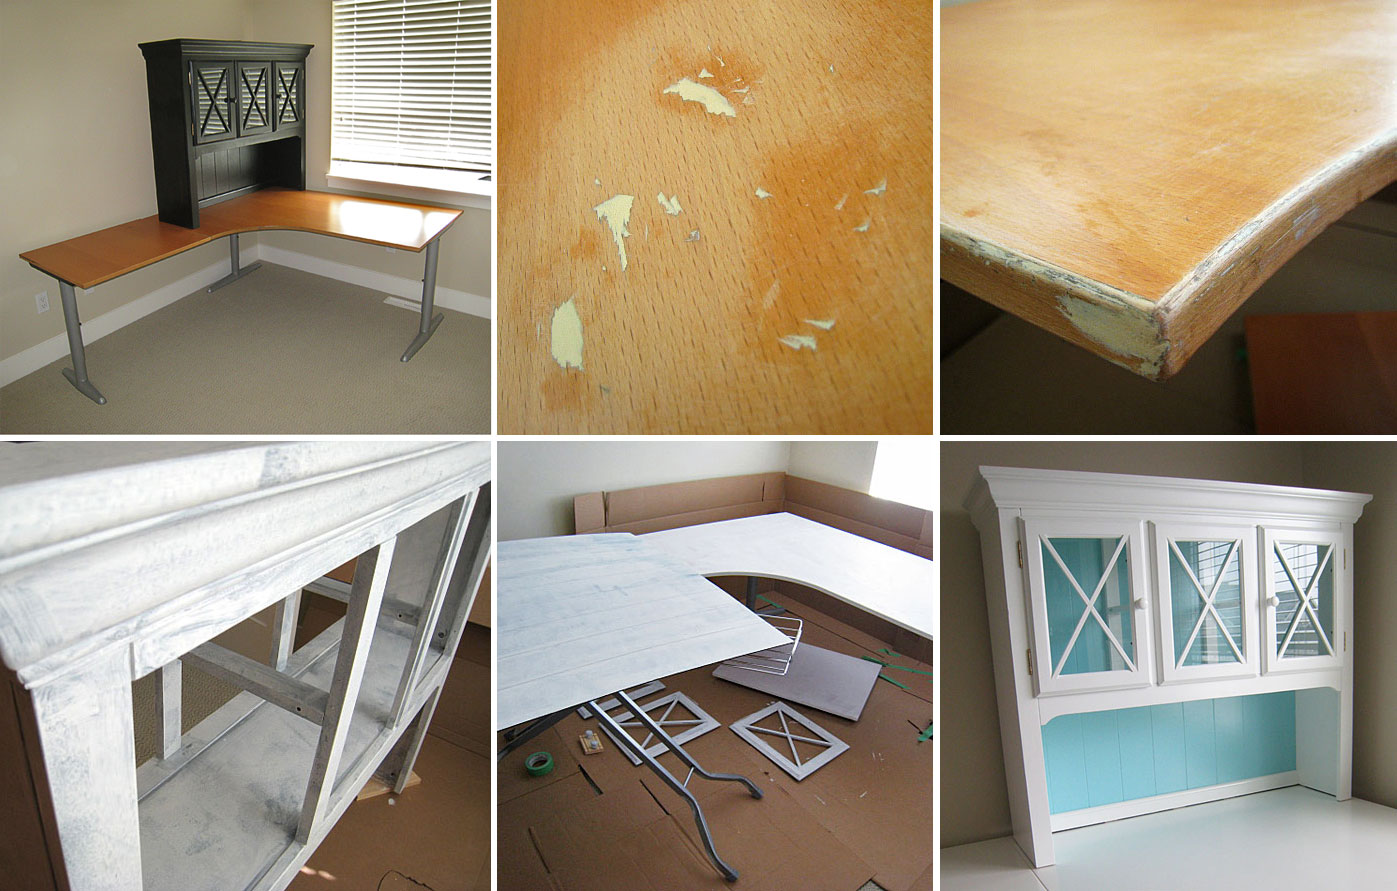
Here it is, all shiny and new - to me anyway. It's all messy with a laptop, die cutter, printer, and paper everywhere already, but at least I remembered to shoot it in it's pristine shape. Here are the nitty gritty photos so I can remind myself how much it took to get it here (and save poor hubby and me more work).


Amazingly, the never-unwrapped hutch was still available after a month sitting on Craigslist Free listings because it had no matching bottom. The L-shaped desk was quite pitted, but fixed easily with wood filler, then rough sanding prepared it for primer paint. An ironing board is great to hold furniture at eye level. Great thing about moving is all the extra cardboard lying around to be used as a drop cloth for paint. Oh Martha, your robin egg blue just screams "craft with me".


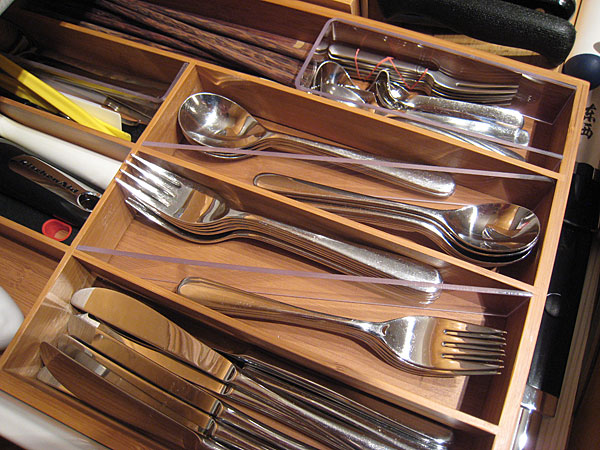
So what's up with the utensil tray? We were very lucky hubby's work had these offcuts of acrylic sheets at exactly the right height - kismet, I know! Our previous kitchen drawer allowed for a 2-tiered tray to divide the large and small spoons and forks, so we had to find a new solution for this tray. I love how the acrylic seamlessly divides and concisely uses space. The chopsticks and teaspoons are tamely corralled with a U-shaped bent piece. Yup, you guessed what I'll be using to divide all my supplies! More to come one day.

Jun 28, 2010

Quilling Strip Storage with Pushpins


A rat’s nest no more – I finally found a method of viewing all my strips at one time. Push pins on foam core help stretch out my poor pretzeled strips. I can access any color and not worry about re-bagging or unintentional crimping from a lid of a hastily packed box. Perhaps I might even label the brand and color along the side. No wonder I’ve been called OC…