Showing posts with label die cutter. Show all posts

Aug 3, 2014

Die Cut Star for Birthday Gift Topper


So I bought a birthday card. GASP! I know, I know. You have to cut me some slack though, as we've been ripping out carpet to install wood flooring. Besides, the card was about aliens and have glow in the dark sticker eyeballs for him to play with, a great compliment to our headlamp gift.

Anyway, as I went to write our nephew our birthday wishes, ink came splooshing out of my Sharpie marker. Why? Because I read that if you have a dry marker, let it soak up rubbing alcohol and it'll be revitalized. Well it was so full of life it couldn't wait to leave it's mark.


Silhouette to the rescue! I grabbed some metallic silver vinyl and cut out the first letter of his name. I then added some more vinyl stars around the card to make it look on purpose.


Of course since my beloved cutter was already on, and I needed a bow to top off the wrapped present, I decided to make the star G much larger, in the form of a tent card.


Adding rectangles to the bottom and overlapping the top and bottom star points, it allowed me to connect all the tent card pieces together and quickly add this on top of his gift, a great foreshadowing of what's inside.


It was supposed to be a quick gift wrap session and let me get back to "home-work", but happy accidents like this make me grateful I was delayed.

Feb 12, 2014

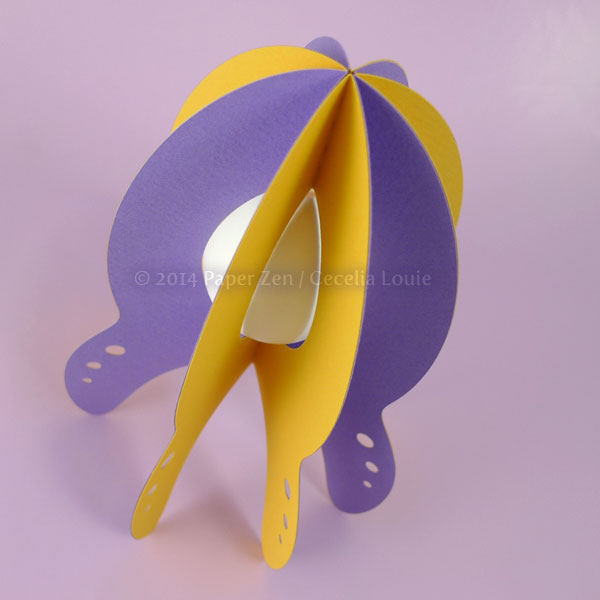
Easter Egg Spaceship


Last year I discovered Jeffery Rudell of Craft Stylish and was inspired to answer his challenge when I read his post, Oeuf Couture: How to Dress an Easter Egg. Easter had passed and I was focused on writing my book at the time, but it was always niggling my brain every few weeks. I know it's not Easter yet, but when you find the time to make something, you make it!


Jeffery's challenge was to make an egg "container" and allow the egg to be its natural color. I honestly love the egg spaceship in minimalist white as well as the final color version.


First, to blow out the contents of the egg, I made a hole in one end and inserted a syringe, then blew air into the egg until it was empty. This is such a contrast to the days when I would go blue in the face trying to blow it out with my mouth. After rinsing I also microwaved it for 10 seconds x 3 times, letting it cool in between sessions.


My favorite part of the spaceship is how the egg nestles so securely within, yet comes popping out when the spaceship is flattened. One thing I've learned is that not all eggs are the same shape! So if I break this one, I'd have to test all the eggs in a container to find another the right size.


I cut 4 yellow and 4 purples spaceships out of Canson Mi-Tientes paper with my Silhouette die cutter.


When gluing the folded halves, it helps to line them up on my table surface.


Ah, like an itch that finally got scratched, it feels so good to get this idea out of my head.

***UPDATE***: After receiving a request, this spaceship pattern is now in my store! Plus I had an extra brain storm. What if you wrote a message, rolled it up, and inserted it inside the egg? That special someone would need to crack the egg to read it! What fun!