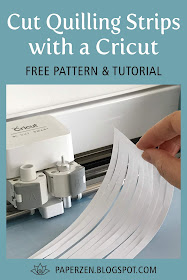
How to Cut Quilling Strips with a Cricut Explore
Ever since I made cutting files for myself, I’ve been giving them away on my blog. If you’ve downloaded my cutting files in the past, then you’ll want to download my updated files because I’ve made significant improvements on them. Watch my video tutorial to see how the cutting path has been made as efficient as possible.
My files are created in 5 widths for:
- inches: 1/16, 1/8, 1/4, 3/8, 1/5
- mm: 1, 2, 3, 5, 10
The following machines can import SVG (Amazon affiliate links):
- Cricut: Explore, Joy, Maker
- Silhouette: Cameo, Curio, SD (with Silhouette Studio® Designer Edition)
- Brother ScanNCut
- Pazzles Vue
- Bosskut Gazelle
The following machines can import DXF:
- Silhouette: Cameo, Curio, SD
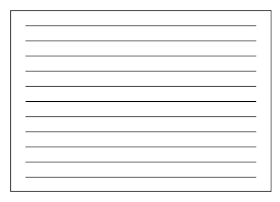
Method 1 - Cut Quilling Strips with Margins
Cut your strips with margins on either side and they will never get tangled. After tearing them off, you'll need to trim the ends to make them clean.Method 2 - Cut Quilling Strips with Fringe
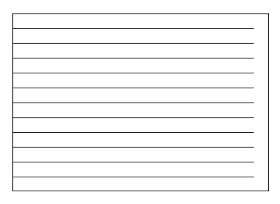
Leave a margin on one side and your strips will still be manageable. There is less wastage than Method 1, and I usually use this method on scrap pieces rather than full sized pieces of paper.Method 3 - Cut Quilling Strips Without Margins
There is no wastage with this method of cutting, and the strips will all be individually cut.Bonus - Happy Birthday Message
Decorate a birthday gift with a unique twist using letters on a ribbon of quilling!


I just got interested in this craft this week. I have a cricut explorer air 2 and have downloaded your amazing svg file. As a beginner, how can I adjust to cut out just a few strips to practice on, instead of cutting out all those strips and wasting paper. I already believed I'm hooked on this beautiful craft.
ReplyDeleteWelcome to quilling Rae! Great question! There is a pause button on your Cricut. So after it's made a few cuts, simply pause the machine and remove the mat. Then you can ask your computer to cancel the remainder of the cut. I'm thrilled to hear you have quilling fever!
DeleteThanks so much for this. When I uploaded the 5 mm svg into cricut design space, it opened at 12.25" wide, and I was unable to cut it since I don't have a longer mat. Is there a way around this issue?
DeleteHi dark kristal, you can unlock the size in Cricut Design Space and easily adjust to fit the width you need. It's at the top in the middle called "SIZE".
DeleteI'm still struggling with this. Can I get my maker 3 to cut 12x12 paper edge to edge so there is no waste?
DeleteTo have your Cricut Maker cut your 12x12 paper from edge to edge, unlock the size ratio and lengthen the measurement to 12.5 inches, and there will be no wastage.
DeleteI want to thank you for offering the free SVG for cutting our own paper for quilling. You are pretty amazing. I just started to do quilling and I enjoyed it. It's very cool to be able to cut my own paper with my Sizzix Eclipse ( I have e-cal programm)Thanks again
ReplyDeleteThat's so sweet of you! Thank you for giving me a huge smile today!!! I'm so happy to hear my SVG files worked with your cutter too! And welcome to the world of quillling! :D
DeleteThank you so much for the files, and the tutorials! I tried to open the MM DXF files, and there is nothing there. Is there somewhere else I can look? Have a wonderful day!
ReplyDeleteHello Shelley, happy to hear you liked my tutorial. Can you explain how you're opening the DXF files? Is it a vector-based program? Have you tried IMPORTING (not OPENING) into your cutting programs?
DeleteCecelia
This is wonderful, thank you! I will be able to find just the colours I want to use so much easier this way. What maximum weight of paper do you find works well before it doesn't roll very well?
ReplyDeleteYou're welcome Rachel. I prefer 70 lb text weight (105 gsm), but it's so challenging to find any colors or selection, so I tend to use Canson Mi-Teintes which is 160 gsm. I find anything heavier is more challenging to roll.
DeleteFabulous, thank you! Again!! :-)
DeleteYou're welcome! I also have a FAQ tab at the top of this page which might shed more light on paper weights.
DeleteTY so much for this aweome tutorial I hope to try this out sometime soon!!
ReplyDeleteYou're very welcome Chris! Hope to hear how to turns out for you!
Delete